When using two servos at the same time, your Arduino board will have a problem distributing enough current. There are different techniques to overcome this. Here you will explore how to write signals to the servos separately through the program. Go here to learn about how to use two servos as wheels.
Example 4.4
In this example you will control two servos, moving one at a time to make sure that the Arduino can provide enough current.
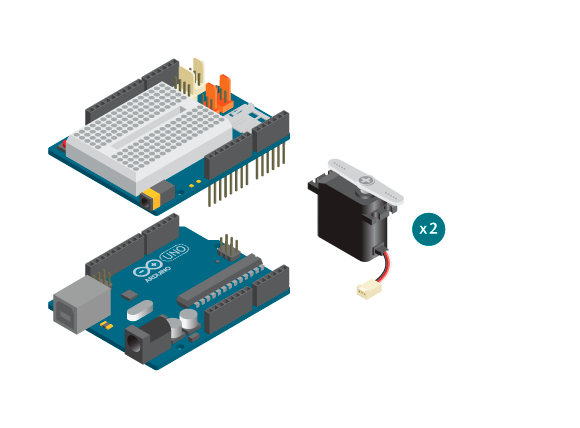
Materials

- 1 Arduino Uno board
- 1 Education Shield
- 2 standard servos
Instructions

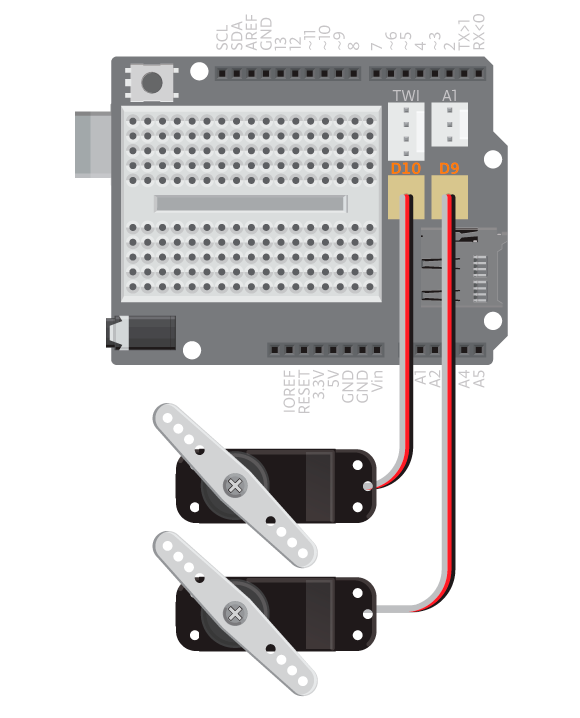
- Attach the shield onto the top of the Arduino board.
- Connect one standard servo to D9 and the other to D10.
- Upload the following code:
Result
The first servo should turn to an angle of 70 degrees, wait 1 second, and then turn to 120 degrees. The second servo should then go through the same movements. This should be repeated.
How it works
- The Servo library is included.
- The Servo objects
myservo1andmyservo2are created. - In
setup(),myservo1is attached to pin 9 andmyservo2is attached to pin 10. - In
loop(),myservo2is detached andmyservo1is attached to pin 9. myservo1is rotated to 70 degrees.- The program pauses for 1000 milliseconds.
myservo1is rotated to 120 degrees.- The program pauses for 1000 milliseconds.
myservo1is detached andmyservo2is attached to pin 10.myservo2is rotated to 70 degrees.- The program pauses for 1000 milliseconds.
myservo2is rotated to 120 degrees.- The program pauses for 1000 milliseconds.
loop()continues to loop.
Learn by doing
- Create a robot that uses a continuous rotation servo and a standard servo to move forward.