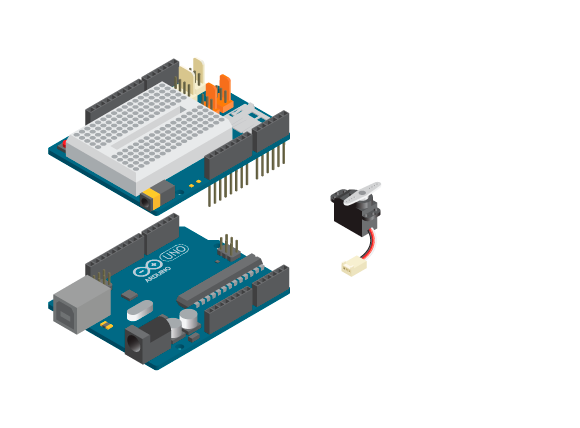
Start with trying out a standard servo. To be able to control a servo with Arduino you will need to use the Servo library. As explained in block 2, a library is a collection of code that you can call from your own code.
Example 4.1
In this example you will control the servo to repeatedly move its arm between 0 and 180 degrees.
Materials

- 1 Arduino Uno board
- 1 Education Shield
- 1 standard servo
Instructions

- Attach the shield onto the top of the Arduino board.
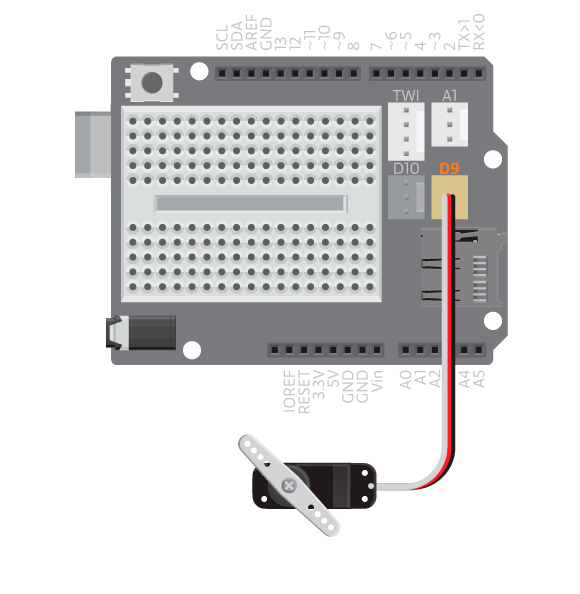
- Attach a servo arm to the standard servo.
- Connect the standard servo to D9.
- Upload the following code:
Result
The servo arm should now turn to a 0 degree angle, wait for 1 second, turn to a 180 degree angle, wait for another second, and then repeat.
New commands
#include: includes the Servo library used to control the servos.Servo servoName: creates a servo object namedservoName.servoName.attach( pinNumber ): attaches the servoservoNameto the digital pinpinNumber.servoName.write( degrees ): makes the standard servo shaft rotate to the position angle specified withdegrees.degreescan be a value between 0 and 180.
How it works
- The Servo library is included.
- The Servo object
myservois declared. - In
setup(),myservois attached to pin 9. - In
loop(), the servo shaft is rotated to 0 degrees. - The program pauses for 1000 milliseconds.
- The servo shaft is rotated to 180 degrees.
- The program pauses for another 1000 milliseconds.
loop()continues to loop.
Learn by doing
- Change the rotation angle of the servo by changing the value inside the write function. Try adding more rotation angles to the program. Also, see what happens if you change the delay time.
- Write a program that makes the servo sweep from one side to the other smoothly. (HINT: see the example Examples>Servo>Sweep)