Ready… Set… Go! Test your reaction time!
In this game, one of three LEDs will randomly light up. You must tap the corresponding capacitive sensor as quick as possible. If you don’t react fast enough, the game is over.
Materials

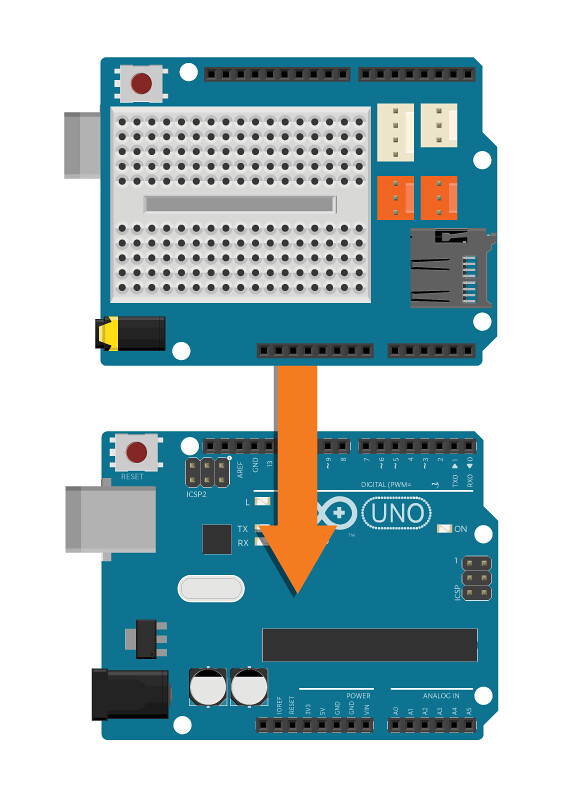
- 1 Arduino Uno board
- 1 Education Shield
- 1 breadboard
- 1 piezo speaker
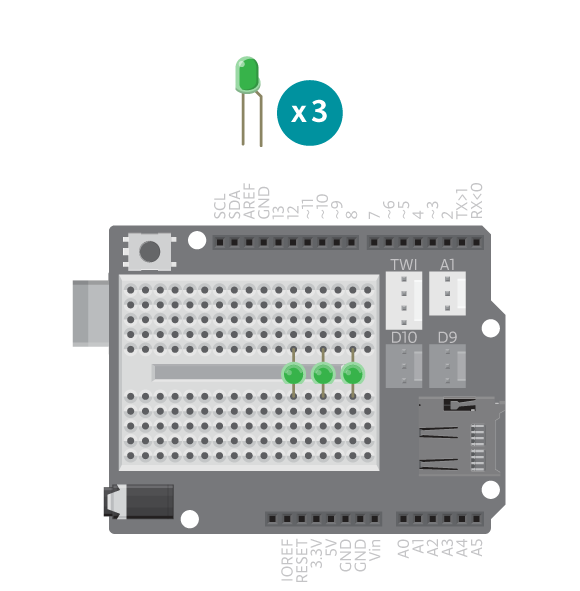
- 3 LEDs
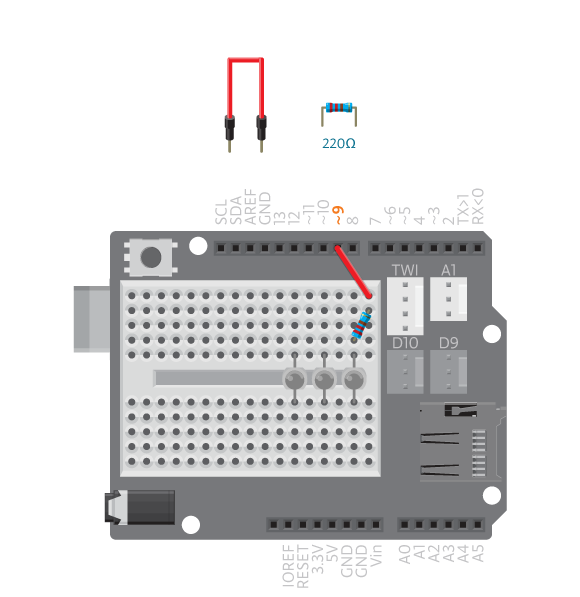
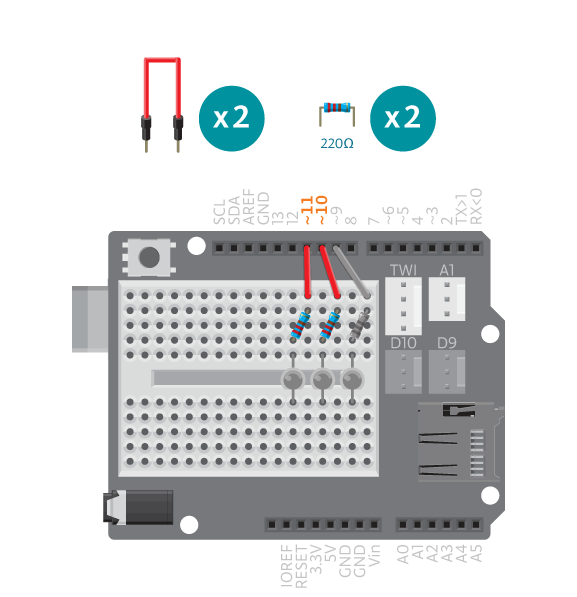
- 3 220 ohm resistors
- 3 1M ohm resistors
- 6 black jumper wires
- 12 colored jumper wires (3 long ones)
- aluminum foil
- masking tape
Instructions
Code
Find the code in File>Examples>EducationShield>Block2-Sports>Projects>React
How it works
- The CapacitiveSensor and EducationShield libraries are included.
- pitches.h is included, the file containing the definitions of the notes.
- The VU-meter variables are declared,
ledPins[],pinCountandLEDs. - An array to hold the three CapacitiveSwitch objects is declared.
- The variable
reactTimeis declared to hold the reaction time in milliseconds. - The Melody object is declared.
- In
setup(), the VU-meter and capacitive switches are configured and initialized. - In
loop(), the program pauses for a random period of time, somewhere between 50 and 2000 milliseconds. - The variable
targetis declared and given a random value between 0 and 3. - The LED in the position of the
targetnumber is turned on. - If the capacitive sensor in the position of the
targetnumber is pressed within the react time, the LED is turned off again. - A short melody is defined by declaring the variables
melody[],noteDurations[]andnumberOfNotes. - The melody is played.
- If the capacitive sensor in the position of the
targetnumber is not pressed within the react time, the program jumps to the functiongameOver(). - In
gameOver(), all LEDs are turned on. - A short melody is defined by declaring the variables
melody[],noteDurations[]and numberOfNotes. - The melody is played.
- All LEDs are blinked.
- All LEDs are turned off.
- The program jumps back to the same place in
loop(). loop()continues to loop.

Troubleshooting
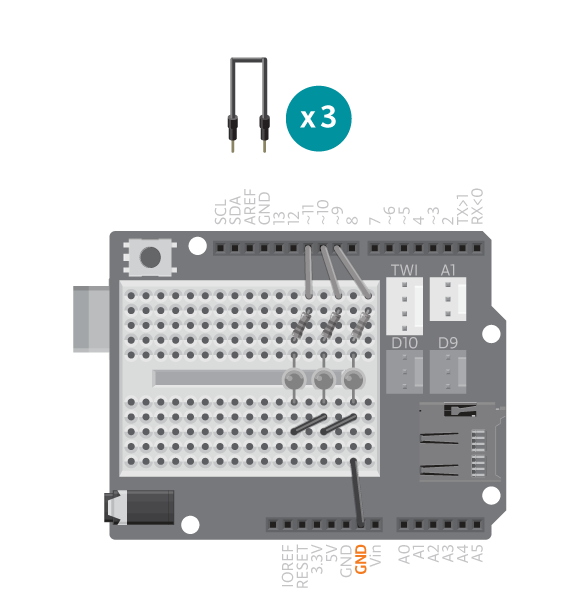
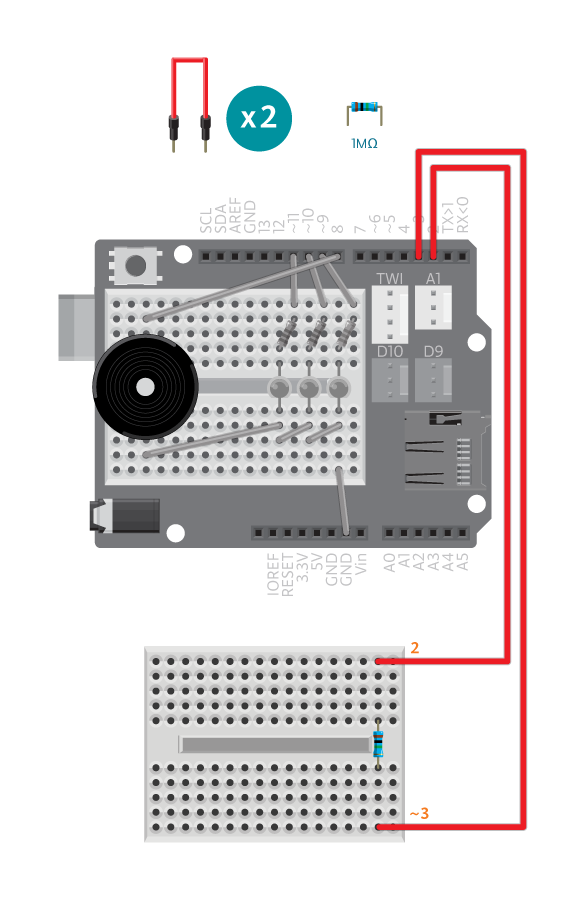
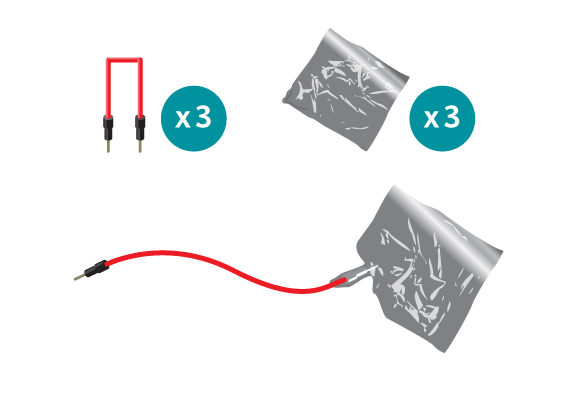
- Refer to the illustration and double check your connections. Make sure the shield and wires are firmly connected. Check the LED polarities to make sure they are consistent and properly wired.
- Increase the allowed reaction time to make the game easier for testing. Make sure to change them back when everything is working.
- If the VU-meter does not work correctly, see VU-Meter reference for debugging VU-meter.
- If the capacitive sensor does not work, see reference CapacitiveSwitch for debugging.
Learn by doing
- Increase game difficulty: change the reaction time and the waiting time.
- Make up your own melodies: change the tones and make a song.
- Improve the game over reaction: change the way the LEDs blink when it is game over. See the VU-meter reference for the commands you can use.
- Add more components: try adding more LEDs and sensors. Do not forget to add them both onto the board and into the code.
