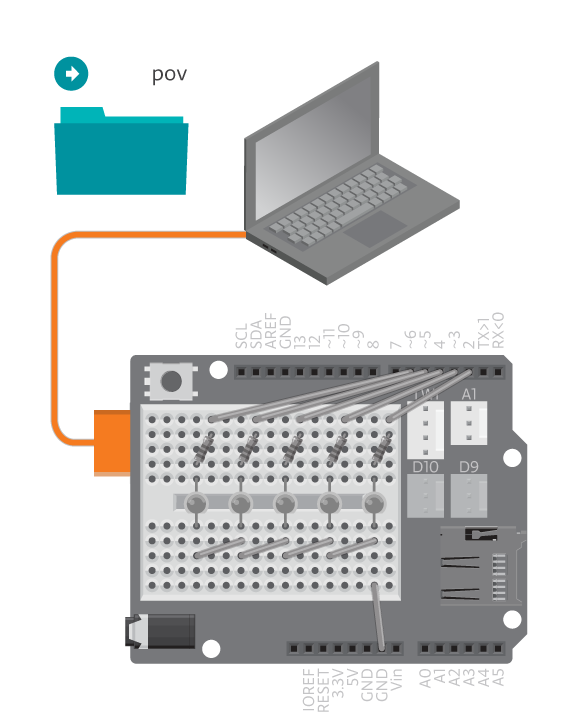
With POV, Persistence Of Vision, you can take a bike wheel and make it into a display with just a few LEDs. Check out this video to see what we mean.
In this project, you will make one of these displays yourself. Wave it with long strokes or even hold it while running to display a text, a statement or a picture. The effect is most visible in a dark place so if you are running, make sure not to run in to a tree or a friend.
Materials
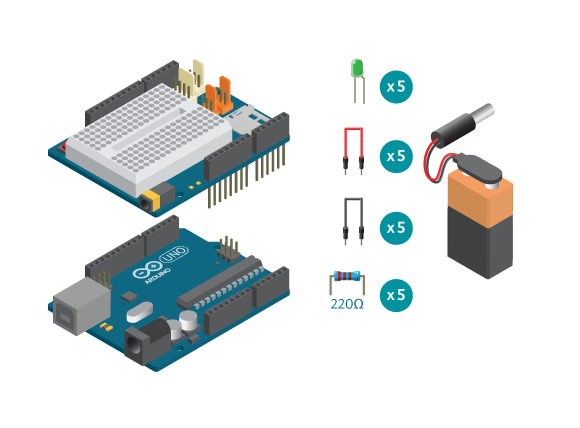
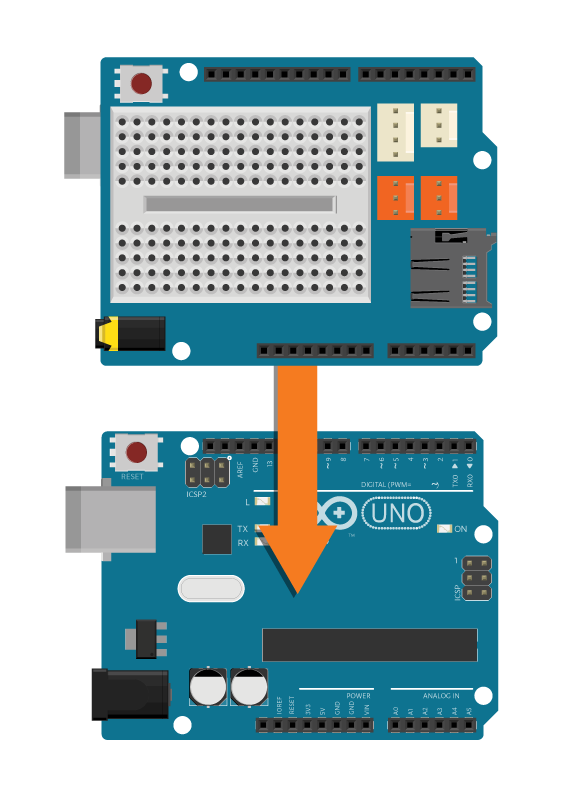
- 1 Arduino Uno board
- 1 Education Shield
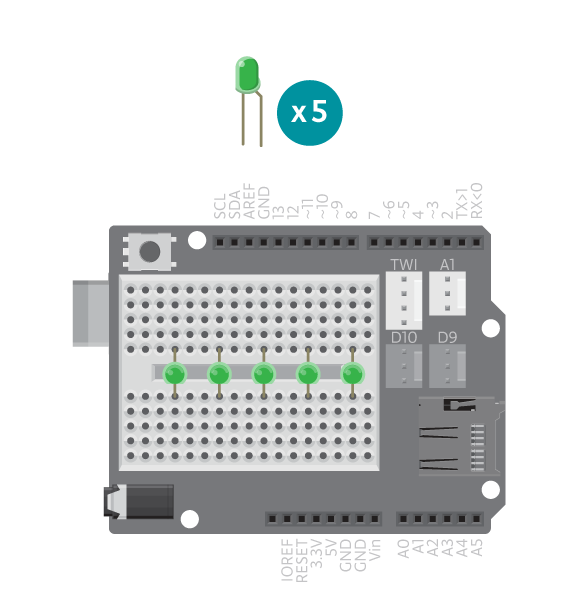
- 5 LEDs
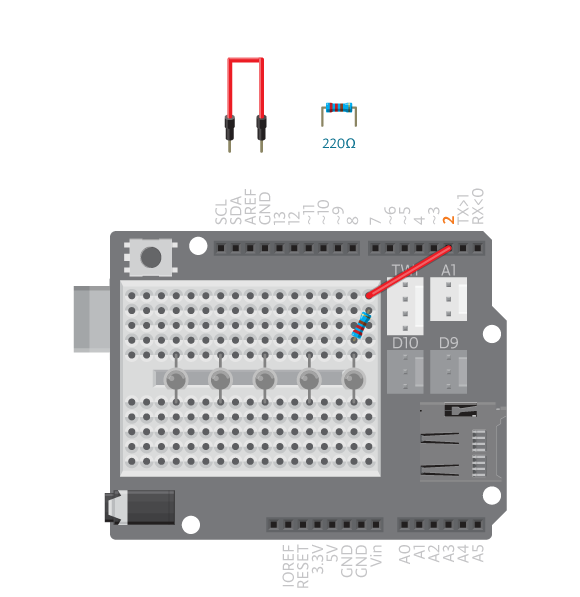
- 5 220 ohm resistors
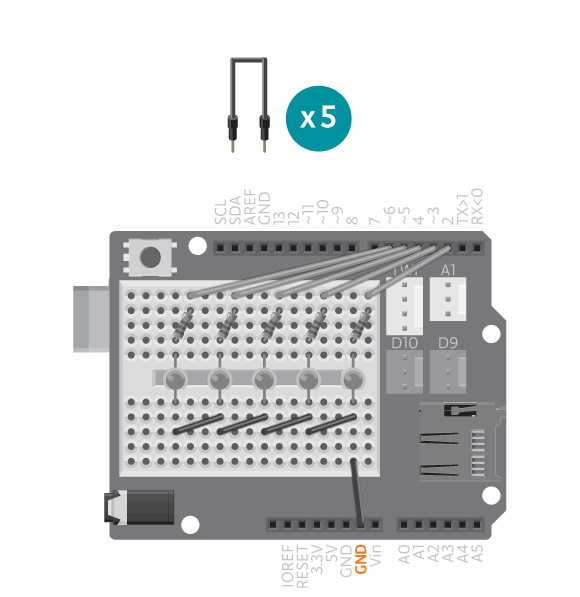
- 5 black jumper wires
- 5 colored jumper wires
- 1 9V battery
- 1 power plug
Instructions
Code
Find the code in File>Examples>EducationShield>Block3-Magic>Projects>POV
How it works
- The EducationShield library is included.
- The VU-meter variables are declared,
ledPins[],pinCountandvuMeter. - The variables that has to do with displaying the message are declared.
rowCountwill be used to keep track on what row number to blink,rowLengthis the width of the message anddelayTimeis how long time each row is displayed, in milliseconds. - The message pattern is defined in a two dimensional array,
message[5][22]. The message is displayed with 5 LEDs, and is 22 rows long. - The message pattern is defined in a way to make it easy to visualize. For each LED there are 22 zeros and ones. A
1represents an LED turned on, and a0represents an LED turned off. - In
setup(), the VU-meter is configured and initialized. - In
loop(), an if statement checks ifrowCountis equal torowLength. If it is, it means that the whole message has been displayed. - To reset,
rowCountis assigned the value 0. - If
rowCountandrowLengthis not equal, the message will be displayed. - A for loop loops for as many times as the value of
pinCount, the amount of LEDs you are using. - In each loop, an if statement checks if
message[i][rowCount]is equal to 1. - In the first loop, both
iandrowCountare equal to 0, somessage[i][rowCount]is not equal to 1 and the LED on the index numberiis turned off. - In the second loop,
iis equal to 1 androwCountis equal to 0, somessage[i][rowCount]is not equal to 1 and the LED on the index numberiis turned off. - When the for loop has finished,
rowCountis increased with 1. - The program pauses for as many milliseconds as the value of
delayTime. - Again, if
rowCountis equal torowLength,rowCountis reset to 0. - This time when the for loop runs,
iis equal to 0 androwCountis equal to 1, somessage[i][rowCount]is equal to 1 and the LED on the index numberiis turned on. - When the for loop is finished,
rowCountis again increased with 1. - The program pauses for as many milliseconds as the value of
delayTime. loop()continues to loop.
Troubleshooting
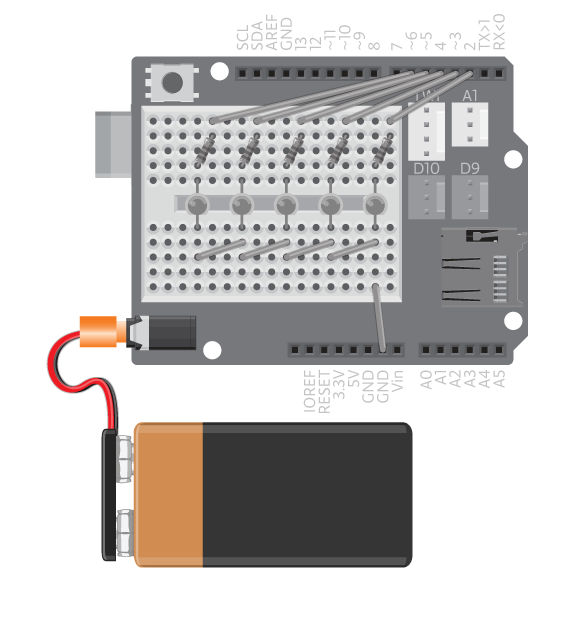
- Refer to the illustration and double check your connections. Make sure the shield and jumper wires are firmly connected. Check the LED polarities to make sure they are consistent and properly wired.
- Make sure the battery is connected properly so the ON LED on Arduino is on. Test with Arduino connected to the computer and 9V battery disconnected. If it works with the USB cable but not with the battery, there could be something wrong with the battery, change for another one.
- If the VU-meter does not work correctly, see the VU-meter reference for debugging
Experiment further
- Try different messages, with different lengths.
- Change the message to a pattern or a drawing.
- Take a photo of yourself waving the POV. Check out the cool effect!
