In this project you will create a clock where the numbers are represented by photographs of digits made out of Post-its. To do this, you will learn to use images in your programs and store them into arrays (explained later). You will go through the programming step by step.

-
Adding Images
The first step is to give your program access to the image.
Drag the image file onto the Processing IDE as shown in the following screenshot:
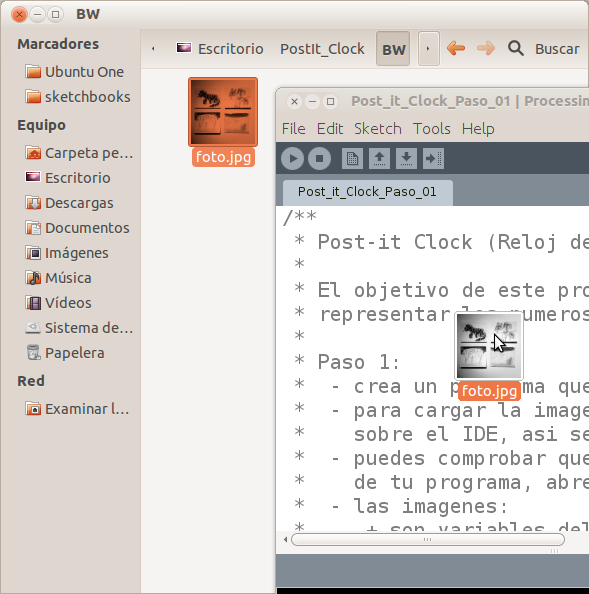
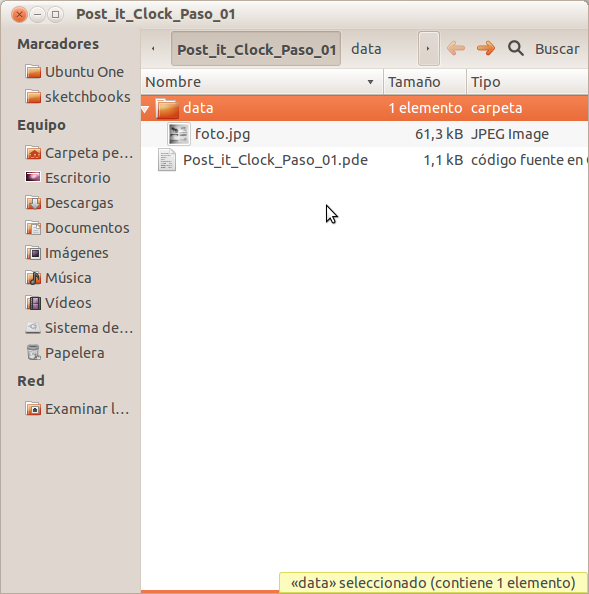
The image is now stored in a subfolder of the program called ‘data’. The screenshot below shows the file structure where you can find your image file. You can also find it from the menu Sketch>Show Sketch Folder.
-
Displaying an image
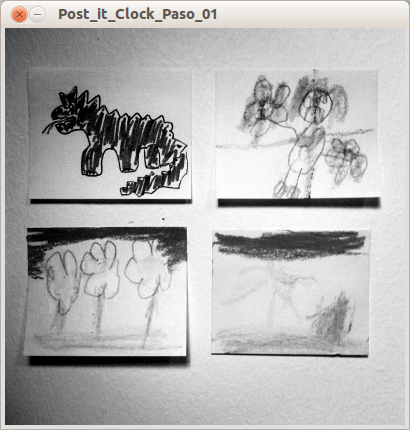
In this step you will use PImage, a type of variable or class, to display an image.
Download the photo here.
New commands
PImage imageName: creates a variable of the typePImagewith the nameimageName. APImagevariable can hold an image.loadImage(imageFile): Loads the imageimageFilelocated in the data directory of the current sketch.imageFilemust be spelled exactly like the name of the file.image(imageName, x, y): Displays thePImage imageName. The top left corner of the image is placed on the coordinatesxandy.
How it works
- A
PImagevariable is created, namedim. - In
setup(), the program window size is set to 400×400 pixels. The same size as the image used in this program. - The image
foto.jpg, is loaded and stored in the variableim. - In
draw(),imis displayed. The top left corner is placed in the coordinates, 0, 0 – the top left corner of the program window. Since the program window and the image are the same size, the image fits perfectly.
-
Displaying two images
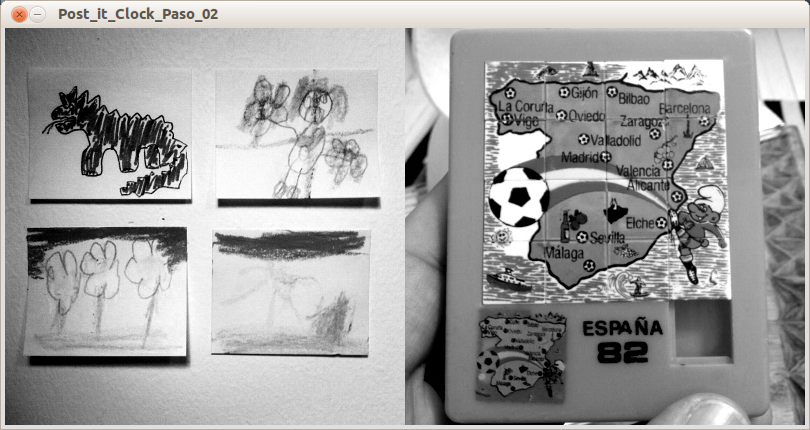
In this step, you will add another PImage to display two images next to each other.
Download the photos foto.jpg and foto2.jpg
How it works
- A second
PImageis declared, namedim2. - In
setup()the size is set to 800×400 pixels, twice as wide as before, to fit the two images side by side. - The image
foto2.jpgis loaded and stored inim2. - In
draw(),im2is displayed afterim. The top left corner is placed in coordinates (400, 0) – top middle of the program window, and the top right corner ofim.
- A second
-
Arrays I
In the next step you will modify the previous step and use an array to display two images. But first, you will learn what an array is.
An array is like a container with many compartments. Each compartment can hold an object and all objects in a container must be of the same type. Each object can be accessed by referencing the compartment where it is held.
For example, an array called FruitContainer of the type Fruits has 3 compartments and can hold 3 objects. Compartment 1 holds a banana, compartment 2 a cherry and compartment 3 a strawberry. If you want to use the cherry, you will look in FruitContainer compartment 2. The numbering of arrays always start with 0 so FruitContainer[0] contains the banana, FruitContainer[1] the cherry and FruitContainer[2] the strawberry.

Arrays can be of the same types as variables, such as an integer or String. The objects contained in an array are called array elements. The maximum number of elements to store in the array has to be declared when declaring the array – 3 in the example above.
-
Arrays II
In this step you will modify step 3 and use a PImage array to display two images.

New commands
datatype arrayName[ ] = new datatype[ numberOfElements ]: creates an array of typedatatype, with the namearrayName.numberOfElementsis the number of elements, or compartments, of data.arrayName[ index ]: accesses anarrayNameelement at theindexnumber. The first elements index number is 0, the second 1, etc.- Read more about arrays and Processing here.
How it works
- A
PImagearray is declared to hold two images, instead of using twoPImagevariables. - In
setup(),foto.jpgis loaded and stored inim[0], andfoto2.jpgis loaded and stored inim[1]. - In
draw(),im[0]is displayed with the top left corner, in coordinates (0,0). im[1]is displayed with the top left corner, in coordinates (400,0).
Result
Note that these changes in the code will not cause any change in the program.
-
Using two Arrays
To further simplify the image variable assignment, you will store the names of all images in an array of Strings.

How it works
- Another array is declared of type
String. It is namedimFileand holds the two file names of the images;foto.jpg, andfoto2.jpg. - In
setup(),imFile[0]is loaded and stored inim[0]. imFile[1]is loaded and stored inim[1].
Result
Note that this change in the code will not cause any change in the program. This change will however make it easier to keep working from here. When adding more images, this will become clearer.
- Another array is declared of type
-
The for() loop
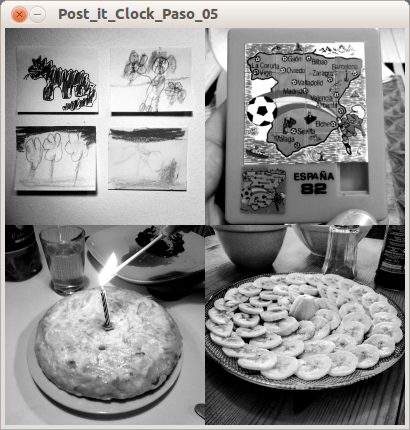
In this step you will increase the number of images to display from two to four. You will still use two arrays as in the previous steps, but to make the code even more efficient you will use a for() loop.
Download the photos banana.jpg, peninsula.jpg, postit.jpg, and tortilla.jpg
New commands:
for(initializer; test; update){ statements }: Allows you to repeat a piece of code as many times as you need. The for loop goes through the following steps:- Runs initiator. Usually this is the declaration of an integer named
i. - Checks
testto be true or false. Usually this is to check ifiis more or less than a certain value. - If
testis false, the loop is exited. Iftestis true, the statements within the curly brackets runs. - Runs the update statement. Usually this is to increase or decrease
iwith 1. - Jumps to step two
- Runs initiator. Usually this is the declaration of an integer named
How it works
- The two arrays are modified to hold 4 elements each.
- In
setup(), the size is set to 800×800 pixels to fit all four images. - A for loop is used to load and store the image files in the
PImagearray:- An integer,
i, is declared and given the value 0. - The test is checked,
i<4, and is true, 0 is less than 4. iis used to access the positions in the arrays. In the first iterationiequals to 0, which means thatimFile[0]andpostit.jpgis loaded and stored inim[0].- The update statement runs which adds 1 to
i,i = i+1. - The test is checked again and is still true, 1 is less than 4.
imFile[1],peninsula.jpg, is loaded and stored inim[1].- The update statement runs again.
- This loops until
iequals 4, when the test will return false, 4 is not less than 4.
- An integer,
- In
draw()the four images are displayed in a grid.
-
Multiple images
Since the objective of this program is to create a post-it clock, in this step you will display all the images that you will later use to represent the time.
Download the images representing the numbers 0, 1, 2, 3, 4, 5, 6, 7, 8 and 9.

How it works
- The two arrays are modified to hold ten elements each.
- In
setup(), the size is set to 700×95 pixels, to be able to display 10 images in a row of the size 70×95 pixels each. - A for loop iterates ten times to load all image files in the
PImagearray,im. - In
draw()another for loop iterates ten times to display the images:- The first iteration when
iis equal to 0,im[0]is displayed with the top left corner in coordinates (0,0), because70*0 = 0. - The second iteration when
iis equal to 1,img[1]is displayed in coordinates (70,0), because70*1 = 70. - This continues to loop until
iis equal to 10.
- The first iteration when
-
The time
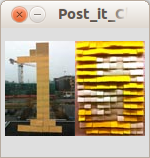
In this step you will display the current hour.
New commands:
hour(): Returns the current hour as a number between 0 and 23.
How it works
- In
setup()the size is set to 140×95 pixels, to fit two images next to each other. - In
draw(), three new variables are declared:h,h_decandh_uni.his used to hold the current hour.h_decandh_uniare used to access the array positions of the images you want to display. - When the current time is 14:30, the following calculations are made:
h =hour() = 14h_dec = int( h/10 ) = int( 1.4 ) = 1h_uni = h-h_dec *10 = 14-1*10 = 14-10 = 4
- When the current time is 02:00 the following calculations are made:
h = hour() = 2h_dec = int( 2/10 ) = int( 0.2 ) = 0h_uni = h-h_dec *10 = 2-0*10 = 2-0 = 2
- The images
im[h_dec]andim[h_uni]are displayed next to each other.
-
The final clock
In this final step you will add minutes and seconds to your clock.

New commands
minute(): Returns the current minute as a value between 0 and 59.second(): Returns the current second as a value between 0 and 59.
How it works
- After the hour images are displayed in
draw(), three new variables are declared,m,m_decandm_unitto hold the minute digits. - When the current time is 14:30, the following calculations are made:
m = minute() = 30m_dec = int( m/10 ) = int( 3 ) = 3m_uni = m-m_dec *10 = 30-3*10 = 30-30 = 0
- The images
im[m_dec]andim[m_uni]are displayed next to each other, below the hour images. - Three additional variables are declared,
s,s_decands_uni, to hold the second digits. - The images
im[s_dec]andim[s_uni]are displayed next to each other, below the minute images.
Learn by doing
- Make a kitchen timer: use the system variables of time to make a countdown image clock.
- Take your own photos of digits and use them in your program.