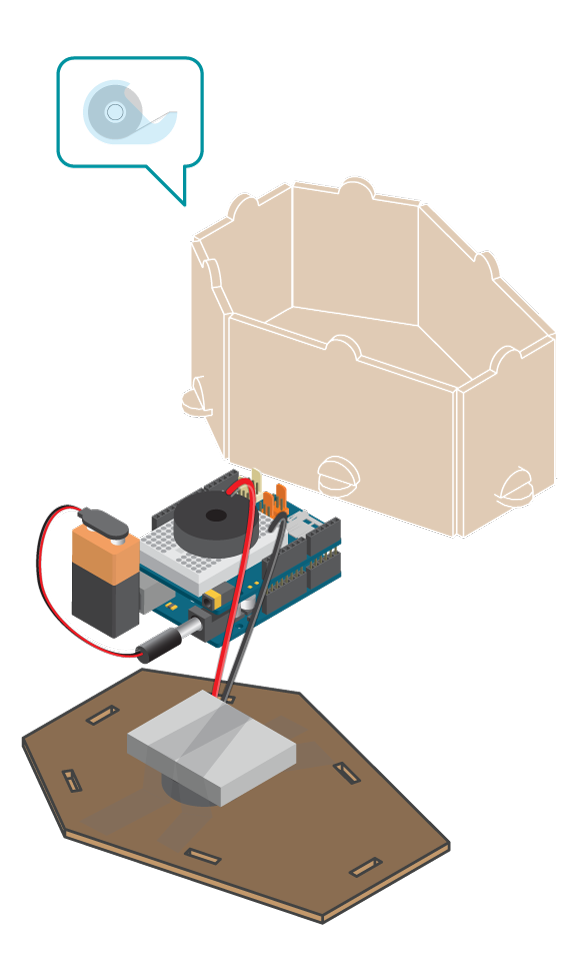
Knock on this coffin to awake the dead. Do not worry, the skeleton will not get out and come after you but it will reply from inside.
Ok, we know that you know that there is not a real skeleton there. It is really a piezo used as a knock sensor. After you have made this project you might think of a handy way to use this sensor in other ways. Check out this secret knock detecting lock for some inspiration.
Materials
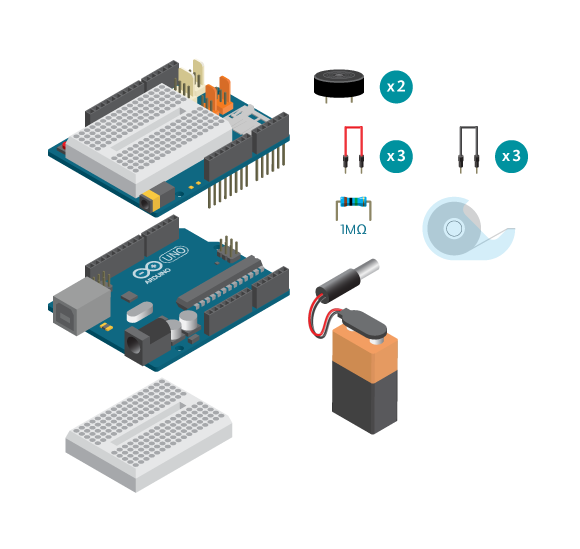
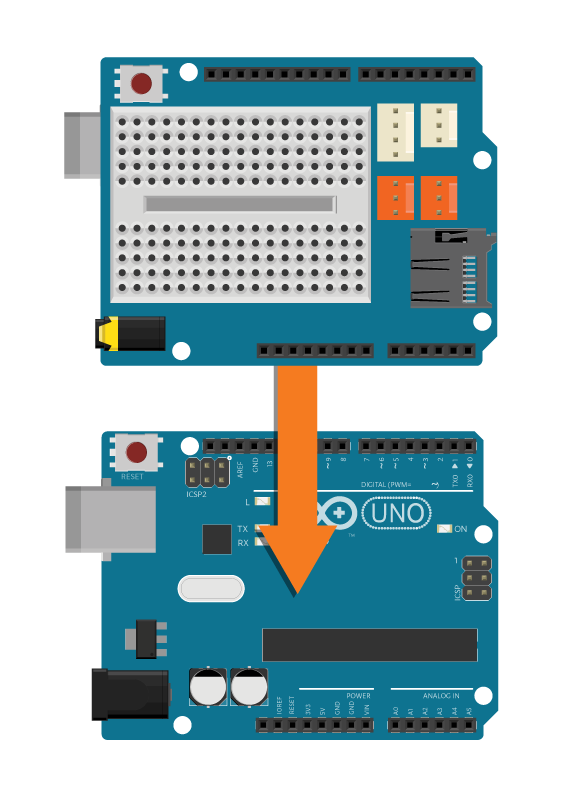
- 1 Arduino Uno board
- 1 Education Shield
- 1 breadboard
- 2 piezo speakers
- 1 1M ohm resistor
- 3 black jumper wires
- 3 colored jumper wires
- 1 9V battery
- 1 power plug
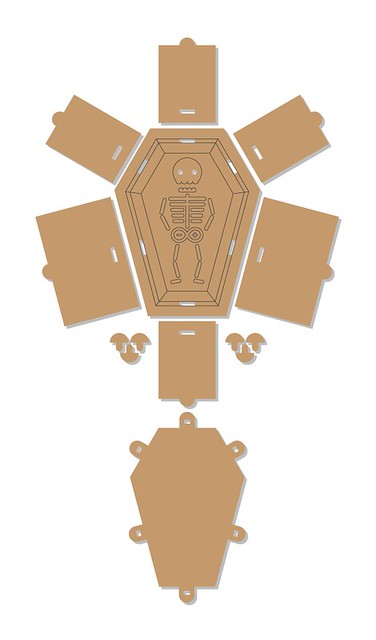
- Knock Knock box kit
- Masking tape
Instructions
Code
Find the code in File>Examples>EducationShield>Block3-Magic>Projects>KnockKnockBox
How it works
- The EducationShield library is included.
- The constant
MAX_KNOCKSis defined to hold the value 30. - The PiezoKnockSensor object is declared,
sensor. - The variable
speakeris declared. - The variables that will be used to keep track on knocks are declared,
timer[],started,timeoutBase,timeout,currentKnock. - In
setup(), the knock sensor is configured. - The knock variables are assigned values.
- The program jumps to the function
clearArray(). - In
clearArray(), a for loop loops through the arraytimer[]and 0 is assigned to each element. - The program jumps back to
setup(). - In
loop(), if a knock is detected the following happens. - If
startedis false, it means that the first knock in a round was detected.startedis assignedtrue. - The variable
currentTimeis declared and assigned the value ofmillis().millis()returns the amount of milliseconds that has passed since the start of the program. timeoutBaseis the variable that will be used to check how long time has passed since the last knock. Therefore, every time a knock is detectedtimeoutBaseis reset by assigning it the value ofcurrentTime.- The value of
currentTimeis also assigned totimer[]of the index ofcurrentKnock. The first time a knock is detectedcurrentKnockis equal to 0, therefore the current time is stored in the first element oftimer[]. currentKnockis increased with 1.- If no knock was detected, the if statement is skipped.
- If
startedistruean additional if statement is used to check if too long of a time has passed since the last knock. - If too long time has passed the program jumps to the function
playBack(). - In
playBack(), a for loop loops through the elements oftimer[]as long as an element is not equal to 0. - For each loop, a tone is played and the program is paused for as many milliseconds as is was detected between the knocks.
- The delay time is calculated by
timer[i+1]-timer[i]. This means the time between the start of the program and the next knock, minus the time between the start of the program and the current knock. - When the for loop is finished, the program jumps back to
loop(). - The parameters are reset by setting
startedtofalse, runningclearArray()and settingcurrentKnockto 0. - If not too long time has passed, nothing happens and
loop()keeps looping, checking for knocks detected.
Troubleshooting
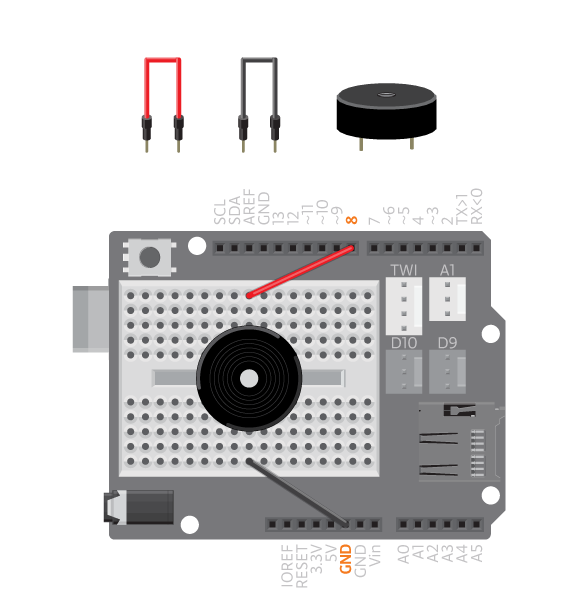
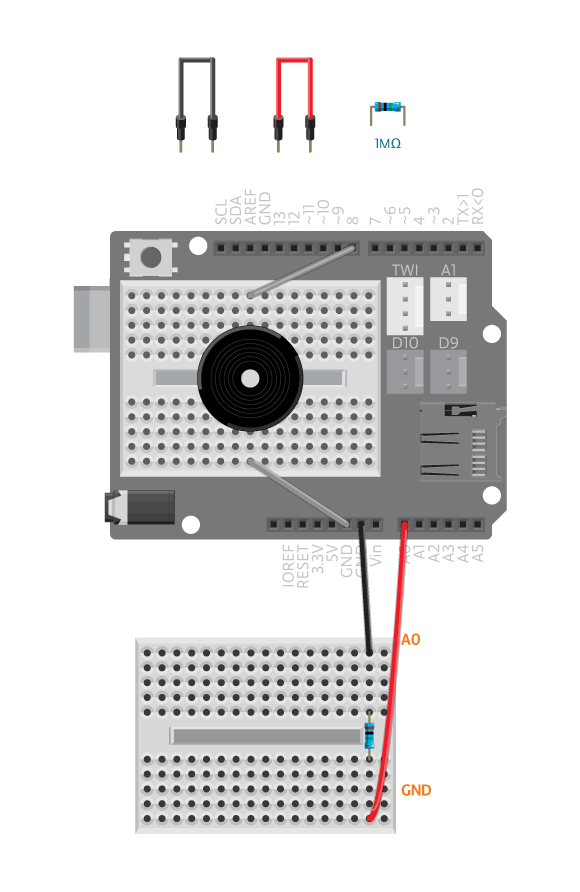
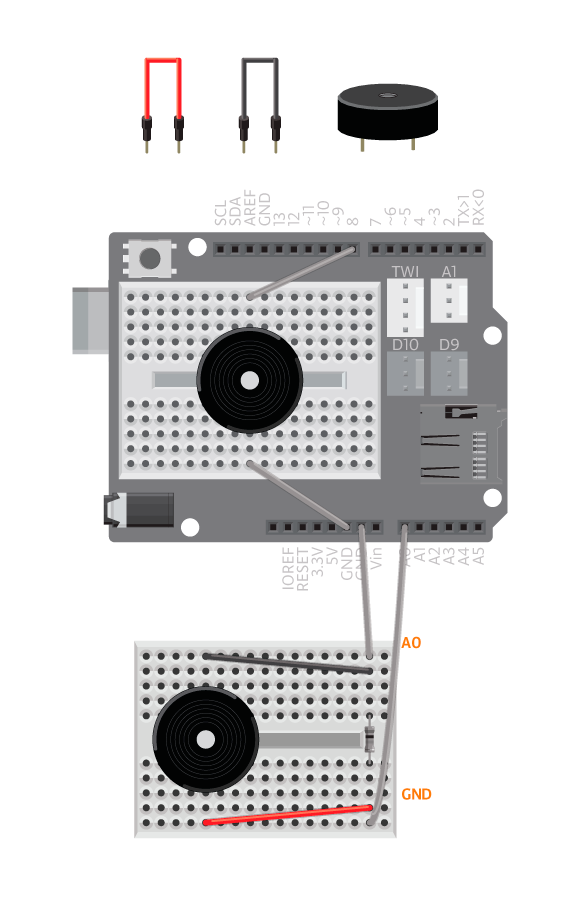
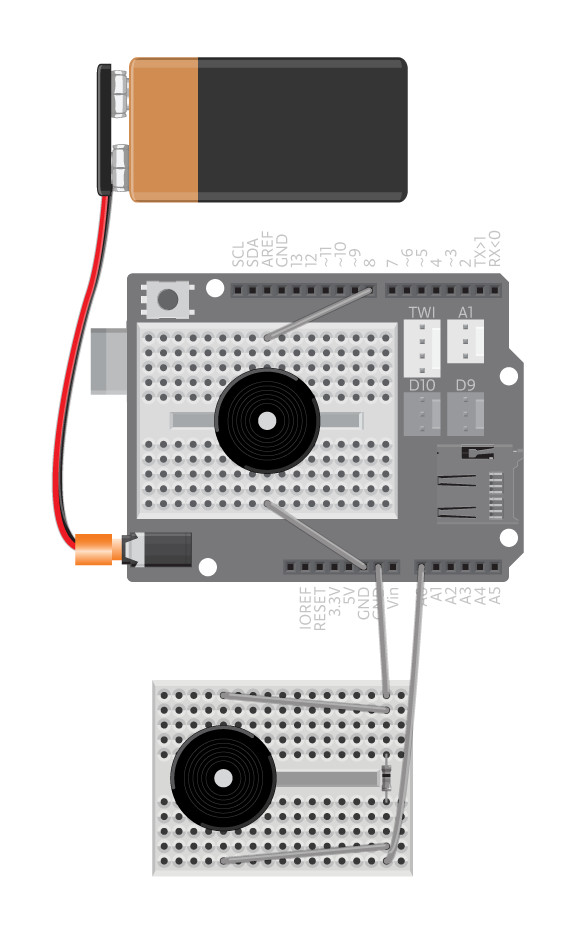
- Refer to the illustration and double check your connections. Make sure the shield and jumper wires are firmly connected.
- Make sure the battery is connected properly so the ON LED on Arduino is on. Test with Arduino connected to the computer and 9V battery disconnected. If it works with the USB cable but not with the battery, there could be something wrong with the battery, change for another one.
- Remember to knock on the right wall of the box (the one with the piezo knock sensor).
- See piezo knock sensor reference for debugging.
Experiment further
- Change the sound of how the box knocks back.
- Add LEDs to the skeleton’s eyes that blink, either when you knock on the box or when the piezo is playing.
