You can use any kind of input to control a servos.
Example 4.3
In this example you will use a potentiometer to control the position of a standard servo.
Materials

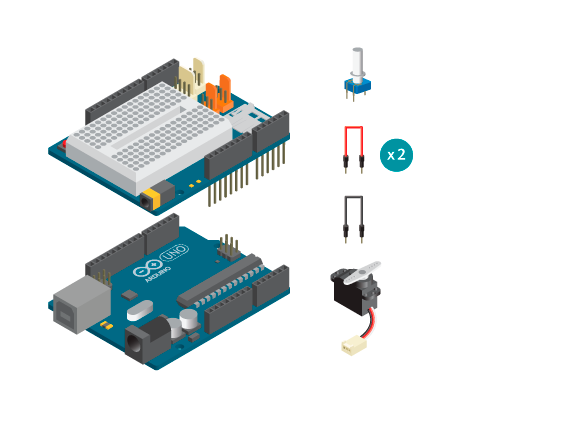
- 1 Arduino Uno board
- 1 Education Shield
- 1 potentiometer
- 1 standard servo
- 3 jumper wires
Instructions

- Attach the shield onto the top of the Arduino board.
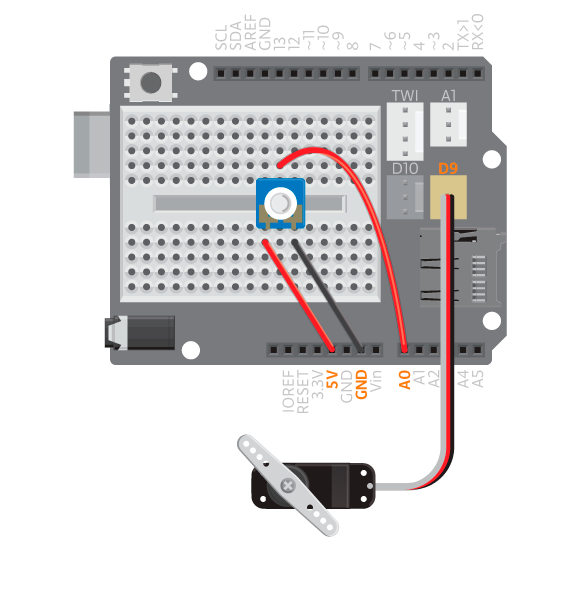
- Connect the potentiometer to the breadboard.
- Connect the single potentiometer pin to analog pin A0, and the other two to 5V and GND using jumper wires.
- Connect the standard servo to D9.
- Upload the following code:
Result
You should now turn the potentiometer to control the position of the servo. Turned all the way in one direction, the servo should go to a 0 degree angle. Turned all the way in the other direction, the servo should go to a 180 degree position.
How it works
- The Servo library is included.
- The Servo object
myservois declared. - The variables
potPinandvalare declared. - In
setup(),myservois attached to pin 9. - In
loop(), the analog value on pin A0 is read and stored inval. - The value of
valis re-mapped from the range 0 – 1023 to 0 – 179 and again stored inval. valis used to set the position angel of the servo shaft.- The program pauses for 15 milliseconds to give the servo time to get into position.
loop()continues to loop.
Learn by doing
- Switch the standard servo with a continuous rotation servo. Use the same code but delete the
delay()function. Upload it and try it again. - Explore what other components you can use to control the servos and what can you attach to the servos to make it more fun.