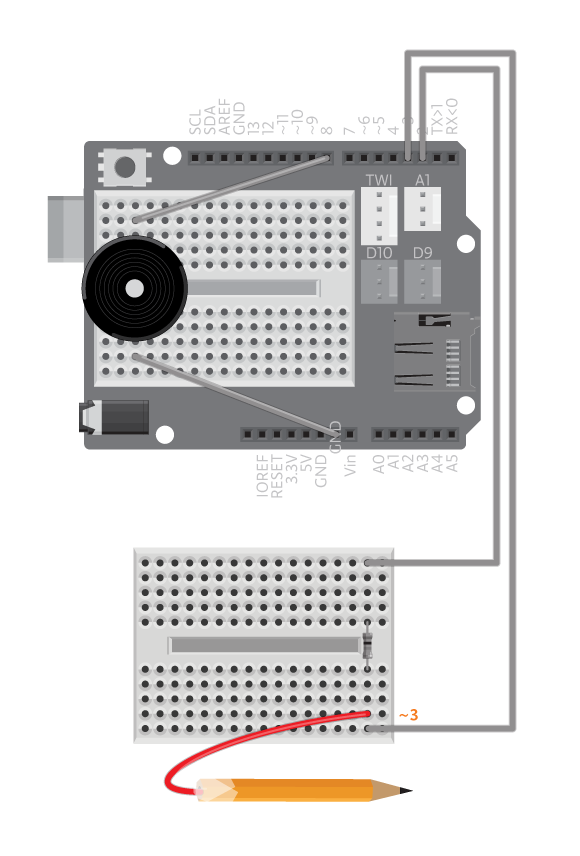
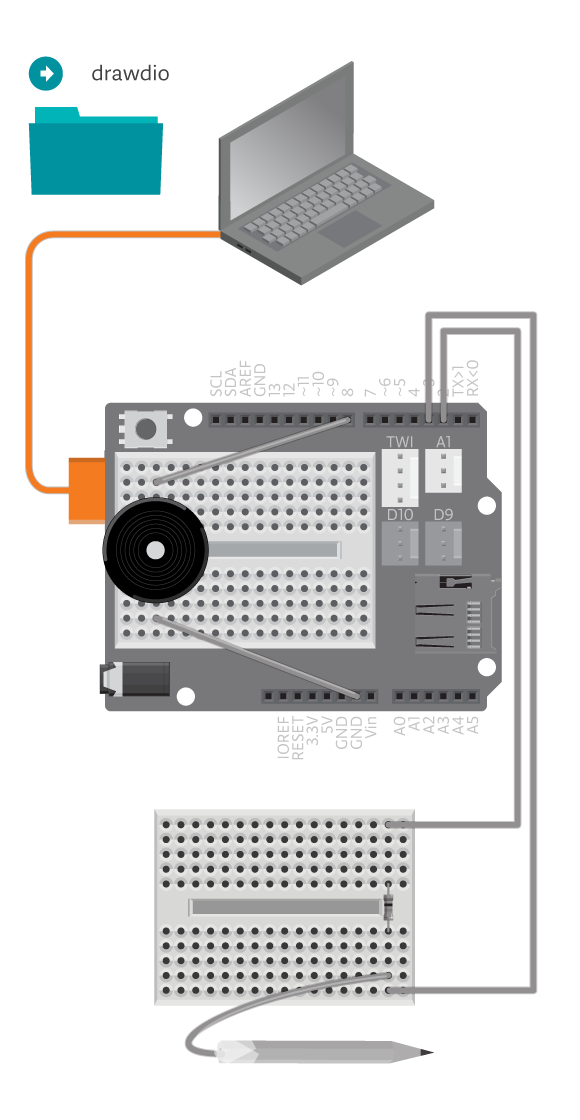
Draw audio with drawdio. You might think that this pen is magic, and it might just be. Drawdio turns (almost) everything that is conductive into an instrument. You can either make music by drawing a picture or by touching the tip of it to different conductive things around you. See some examples of ways to use it in this video.
Materials
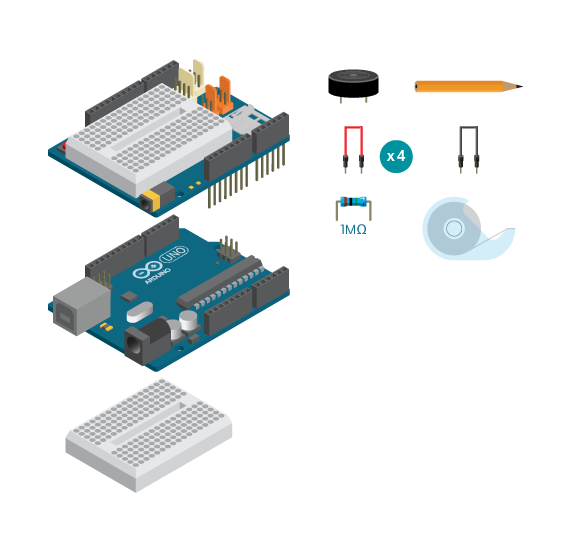
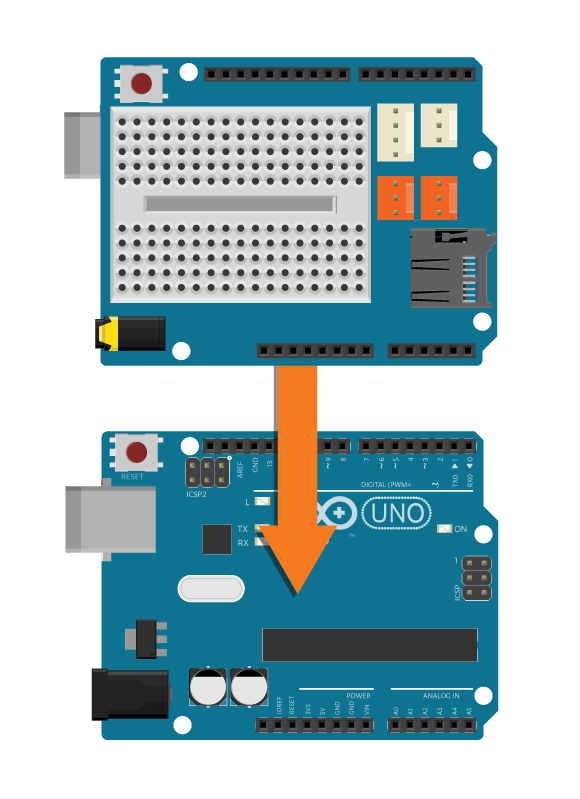
- 1 Arduino Uno board
- 1 Education Shield
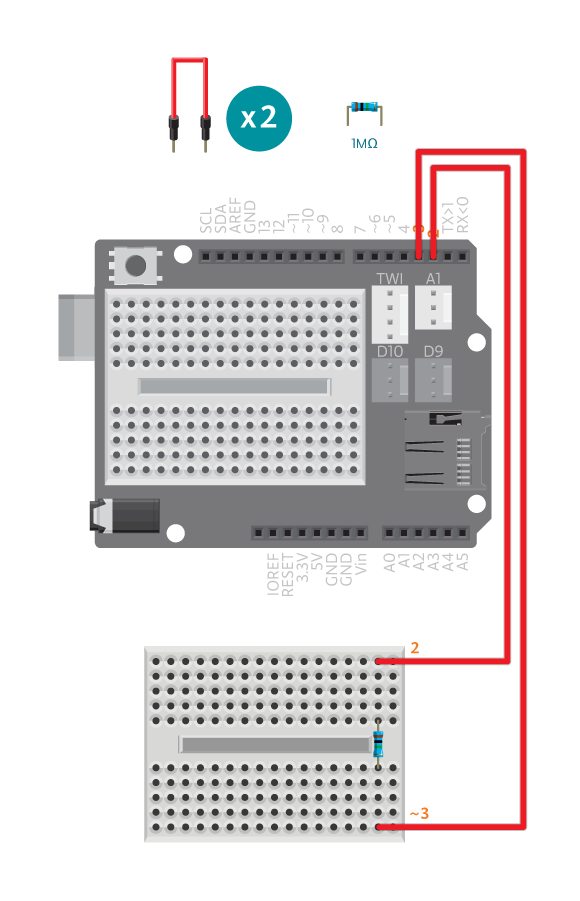
- 1 breadboard
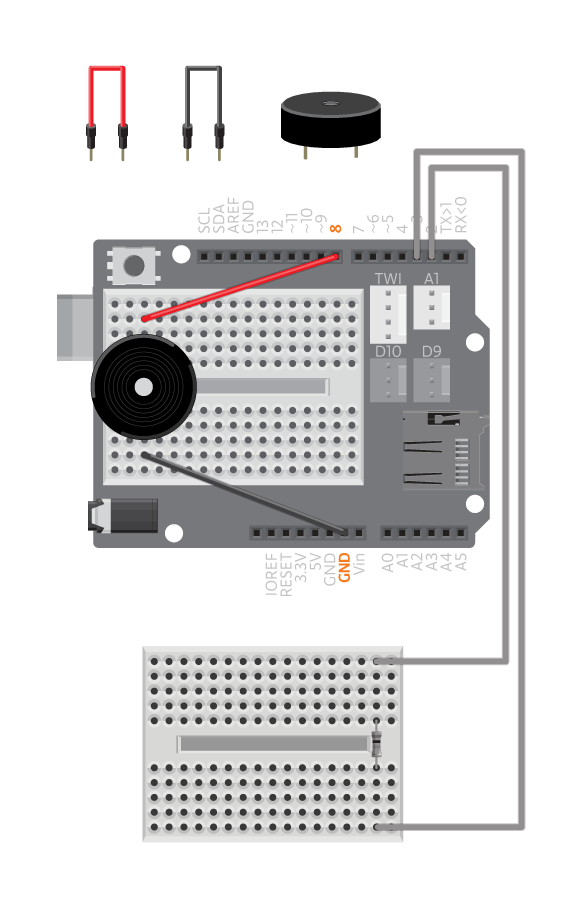
- 1 piezo speaker
- 1 1M ohm resistor
- 1 black jumper wire
- 4 colored jumper wires
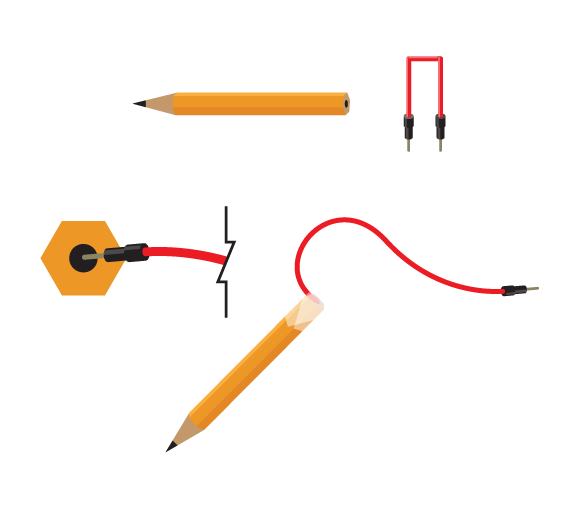
- 1 9B pencil
- Masking tape
Instructions
Code
Find the code in File>Examples>EducationShield>Block3-Magic>Projects>Drawdio
How it works
- The EducationShield and CapacitiveSensor libraries are included.
- pitches.h is included, the file containing the definitions of the notes.
- The CapacitiveSwitch and Melody objects are declared,
meandspeaker. - The CapacitiveSwitch and Melody variables are declared.
- Nothing happens in
setup(). - The variable
valueis declared to hold the read value from the capacitive sensor. If the read value is lower thanlowerThreshold,valuewill be equal to 0. - The variable
pitchis declared. - If
valueis more than 0,pitchis assigned a value mapped fromlowerThresholdandupperThreshold, totoneLowandtoneHigh. - Else if
valueis not more than 0,pitchwill be equal to 0. - A tone is played using the variable
pitch loop()continues to loop.
Troubleshooting
- Refer to the illustration and double check your connections. Make sure the shield and jumper wires are firmly connected.
- Metallic objects are conductive, but may not work for Drawdio. Water, human skin, fruit, plants and pencil drawings make better use for Drawdio. Use File>Examples>EducationShield>Help>CapacitiveSwitchTest to experiment on the capacitance of different objects.
- If using pencil drawings, make sure the lines and shapes are broad and thick. Try touching one end of the object when you are using Drawdio.
- See the capacitive sensor reference for more explanation.
Learn by doing
- Fine tune Drawdio, so that it’s more accurate with the objects you’re using.
- Change the sound Drawdio can play.
- Use the most creative material you can find for Drawdio.
