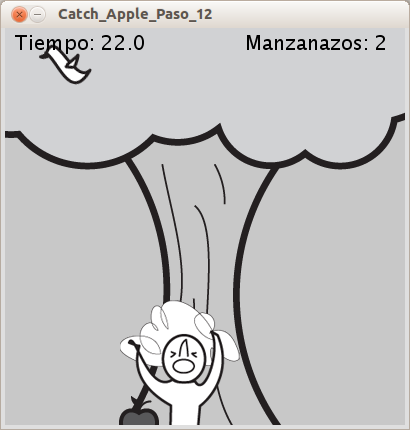
In this project, you will delve a bit deeper into programming. You will create a game where the famous scientist, Newton, tries to get apples to fall on his head.
You will create the game step-by-step, adding complexity as you move along. The aim is for Newton to collect points by getting bumped on the head by as many apples as possible in half a minute.
-
Create an apple and a scientist
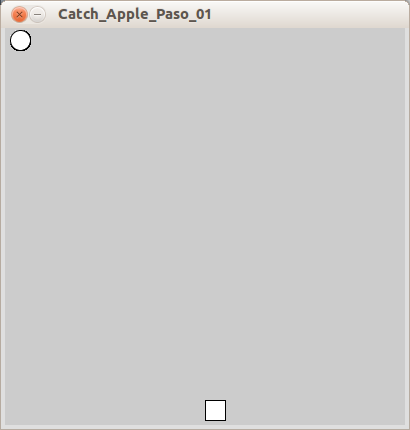
You will start with creating an apple and a scientist. For now, apples will be represented by circles and Newton will be represented by a square.
New commands
rect( x, y, rectWidth, rectHeight ): Draws a rectangle.xandysets the coordinates of the upper left corner,rectWidthandrectHeightsets the size in pixels.
How it works
- In
setup()the program window size is set to 400×400 pixels. - In
draw()a circle is drawn in the coordinates (15, 15), with thexandydiameter 20 pixels. - A square is drawn with the top left corner in coordinates (
width/2,height-25) and with the size 20×20 pixels.
-
Take control of Newton with the keyboard
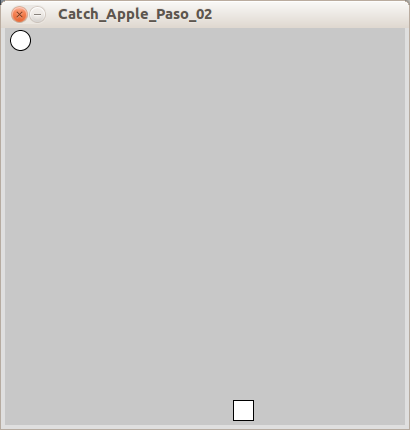
In this step you will make the Newton square move with the left and right arrow keys.
New commands:
keyPressed(){ statements }: Is called when a key is pressed. Meaning that when a key is pressed, the statements within the curly brackets will run.keyCode: returns the value of the key pressed.RIGHT: Constant that holds the key code value of the right arrow key.LEFT: Constant that holds the key code value of the left arrow key.
How it works
- An integer variable,
nX, is declared and given the value 0. This variable will hold the x coordinate of Newton’s (the square’s) position. - In
draw(), the background is set to light grey. Resetting the background in the beginning ofdraw()prevents the square from leaving a trace when it is moving. - The x position of the square is set with the variable
nX. The y position is stillheight-25. - The function
keyPressed()is called every time a key is pressed. - If the right arrow key is pressed,
if( keyCode == RIGHT), 3 is added tonX. Making the square move 3 pixels to the right. - If the left arrow key is pressed,
if( keyCode == LEFT), 3 is subtracted fromnX. Making the square move 3 pixels to the left.
-
Limit the movement of the square
In this step you will use if statements to limit the Newton squares X coordinate, making it always stay within the program window.

How it works
- In the end of the
keyPressed()function, there are two new if statements:- If
nXis less than 0,if( nX<0 ),nXis set to 0. Making the square not being able to move past the left border. - If
nXis more than width – 20,if( nX>width-20 ),nXis set towidth-20. Making the square not being able to move past the right border.
Checking ifnXis bigger than width-20 instead ofwidth, makes sure that the square is still visible, since the square is 20 pixels wide.
- If
- In the end of the
-
Falling Apples
In this step you will make the apple circles fall from the sky. You will create a variable that holds the Y coordinate of the circle, and increase it until the apple reaches the bottom of the program window.

How it works
- A new integer variable is declared,
mY, to hold the y coordinate of the circles’ (apples’) position and given the value 0. - Each time
draw() runs, 1 is added tomY,mY=mY+1, making the circle get 1 pixel closer to the bottom of the window. - An if statement checks if
mYis more thanheight,if( mY>height ). If it is, it means that the circle has reached the bottom of the screen, and mY is set to 0 again.
- A new integer variable is declared,
-
A little random
Until now, the apples always fall from the same position at the top of the program window, so it is quite predictable. In this step you will generate a random number for the circles X coordinate, every time it starts from the top.

New commands
random(high): Generates a random number between 0 andhigh. You can also userandom(low, high)to get a random number betweenlowandhigh.
How it works
- A new integer variable is declared,
mX, to hold the X coordinate of the circles’ (apples’) position and given the value 15. - When the circle reaches the bottom,
if( mY>height), it is given a new X coordinate. A random generated number between 0 andwidth-20,mX = int( random( width-20 ) ). - The circle is drawn using
mXas the X coordinate,ellipse( mX, mY, 20, 20).
-
Collision Detection
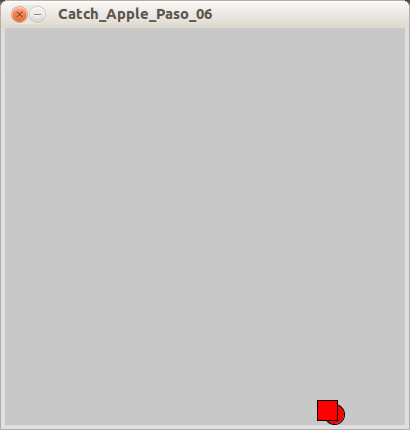
Collision detection is to detect if two objects are colliding. In this step you will check if the apple is colliding with Newton, using an if statement. A detected collision will make the square and circle red.
New commands
if( test1 && test2){ statements }: checks several tests in one if statement. All tests must be true for the statements within the curly brackets to run.
How it works
- A new integer variable is declared,
nY, to hold the Y coordinate of the square (Newton) position and given the value 0. This is to make it easier to check for collision. - In
setup(),nYis given the valuewidth-20. This must be done insetup()after the size is set. Otherwisewidthwill not hold the correct value. - The filling color is set to white,
fill(255), so that it can be changed when a collision is detected. - The collision detection is done with two if statements, one within the other:
- The first one checks if the circle is in the same height as the square,
if( mY+10 > nY && mY-10 < nY+20).
Meaning if the circles bottom point (mY+10) is below the squares top point (nY), and the circles top point (mY-10) is above the squares bottom point (nY+20). If this is true, the second if statement is checked. - The second if statement checks if the circle is in the same x range as the square.
- The first one checks if the circle is in the same height as the square,
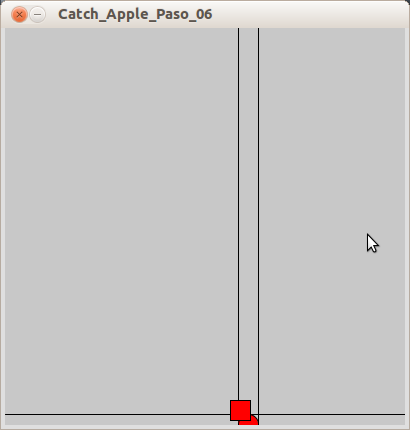
In addition, if you enable the following lines in the program, you will see a series of lines on the screen framing the movement of the objects. You can use this to better test and visualize the collision.
// lines of code to understand how collision works
// erase the comment in order to see the code
line(0,mY-10,width,mY-10);
line(mX-10,0,mX-10,height);
line(0,mY+10,width,mY+10);
line(mX+10,0,mX+10,height);
-
Faster
To make the game more interesting, in this step you will make the apples fall faster.

How it works
- To prepare for the next step, the variable
mYis made a float instead of an int. - The float variable
mVis declared to hold the value 3. This is the velocity of the apple. - In
draw(), the Y position of the apple, is set by increasingmYwith the velocity,mV.
- To prepare for the next step, the variable
-
Newton likes gravity, give him more
In this step you will modify the apples to fall responding to the acceleration of gravity. Each apple will fall faster, the closer to the ground it gets.

How it works
- When the velocity variable,
mVis declared, it is assigned to hold the value 0. - A new float variable is declared,
mA, to hold the accelaration value 0.05. (In real life it is 0.98, but that would make the game too hard to play.) - In
draw(), the apple velocity is set by increasingmVwithmA. This makes the speed higher and higher each timedraw()runs. - The apple Y position is still set by increasing
mYwithmV. This makes the apple move in bigger and bigger steps each timedraw()runs. - When a new apple is dropped, that is in the if statement where
mYis checked to be more thanheight, the velocity is reset to be equal to 0.
- When the velocity variable,
-
Count the points
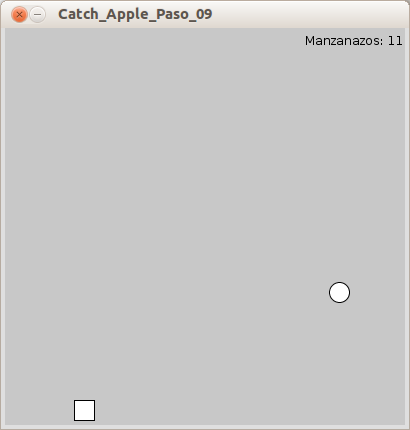
In this step you will implement a counter that shows how many apples have landed on Newtons head.
New commands
text( text, x, y): Displaystexton the coordinatesxandy, wheretextis a String.
How it works
- A new int variable is declared,
p, to hold the points. - In the if statements where the collision detection is done, after the fill color is set to red,
pis increased with 1. - In the last lines of code in
draw(), the fill color is set to black. - A text is drawn in the coordinates (
3*width/4,20). The text says “Hits:“ plus the value ofp.
Note: As you start having a lot of variables in your program, it is recommended that you add comments to remind you of their purpose. -
Oops, error
You may have noticed that your program is posting incorrect points. Each time the apple falls on Newton’s head your counter goes up about 5 points. This is because the counter keeps on counting as long as the apple overlaps Newton.
To correct this you will create a boolean variable (a variable that can be either true or false) to tell the program to count the points or not.

New commands
if( boolean ){ statements }: Checks if abooleanvariable is true and runs thestatementsif it is. You can also check if thebooleanis false by writingif( !boolean ).
How it works
- A new boolean variable,
pCountis declared. Points will only be counted when this variable is true. - Just after the velocity is reset to 0, in the if statement that checks if
mYis more thanheight,pCount is set to be true. - When a collision is detected,
pis increased with 1, only ifpCountis true. pCountis then set to false.- Next time a new apple is dropped,
pCount is again set to be true.
-
And time begins
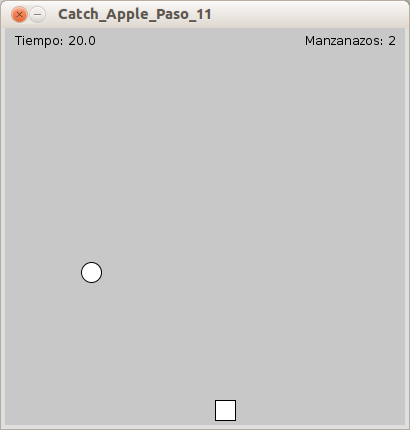
The objective of the game is to get as many apples as possible in Newtons head within half a minute. In this step you will create a countdown timer and display it on the screen
New commands
long: Datatype for large whole numbers. Has more space than an integer. It is convenient to uselongwhen handling time variables because that data can be very large.noLoop(): Stops the continuous execution of the code insidedraw(). To resume the program you need to callloop().millis(): Returns the amount of milliseconds that have passed since the start of the program.
How it works
- A long variable,
tis declared to hold the time. - In
setup(),tis set to be equal tomillis(). Sincetis given its value in the end ofsetup(), it will be close to 0, but even closer to when the actual game starts. - In
draw(), after the rectangle and ellipse are drawn, the float variabletimeris declared. - timer is assigned to hold the value
(millis()-t) / 1000. Because it is divided by 1000, it will hold the amount of seconds passed, instead of milliseconds. - If
timeris equal or more than 30, 30 seconds has passed andnoLoop()is called which will stop the program. - A text is drawn in the coordinates (10, 20). The text says “
Time:“ plus the value of30 - t. This makes the text show the time counting down.
-
Add images to our game
In the final step you add PNG images to display the background, apples and Newton. You can create your own ones, find some online, or use these provided ones.

How it works
- The String array
imFiles[]is declared to hold all the filenames of the images to use. - The PImage array
im[] is declared to hold the images to use. - In
setup(), a for loop is used to loop through all image file names ofimFiles[], and load the images toim[]. im[0]contains the background image and is displayed to fit the program window, in the beginning ofdraw().im[1]contains the apple image and is displayed just after the collision detection.im[2]andim[3]contain the Newton images, the first one is regular Newton and the second one is Newton being hit in the head. The boolean variablepCountis used to decide which image is to be displayed.- If
pCountis true, it means that the program is ready to count points if a collision is detected, and the regular Newton,im[2], is displayed. - If
pCountis not true, it means that a collision is detected and that a point has been counted, and the hit Newton,im[3], is displayed. - In the if statements that check for collision, the values has been modified to fit the sizes of the images instead of the shapes used previously.
Note: It is important that the images are PNGs if you want to have transparency between the images and the background. Do not forget to set the collision values to fit the proportions of your images. - The String array
Learn by doing
- Custom graphics: try creating custom images of your own like new pictures or drawings.
- Opening screen: try a screen that loads the game once a button is pressed.
- Ending screen: make it show the results once time has expired.
- Game restart: try making the game restart after the time has expired. Do not forget to reset all the variables needed.
- Acceleration change: try to make the apple move by changing the acceleration instead of speed.