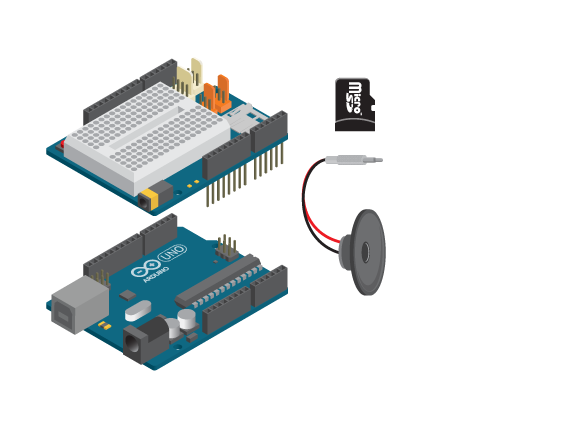
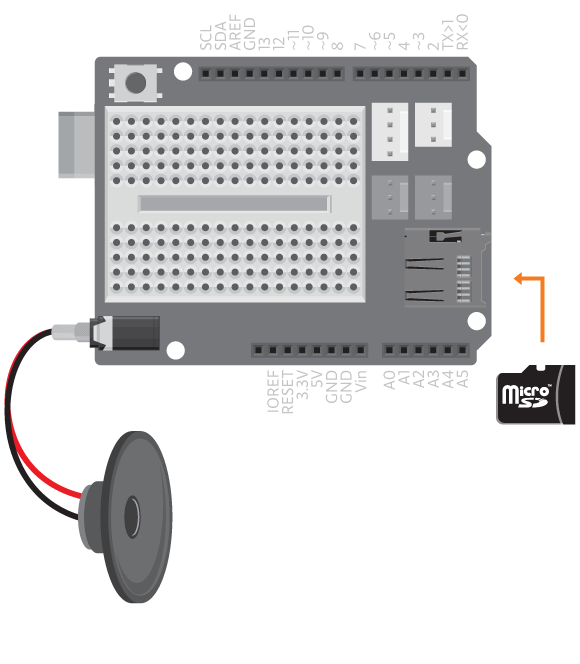
Player is a class in the EducationShied library that uses the Arduino SD library to read wav files from your micro SD card and play them.
Materials

- 1 Arduino Uno board
- 1 Education shield
- 1 micro SD card
- 1 8 ohm speaker
Instructions

- Record a wav sound piece with your computer, name it “0.wav”. See the reference Prepare wav sound. Or use the pre recorded sample in the sketch folder. Find it by going to Sketch>Show Sketch Folder.
- Save the wav file to the root directory of the micro SD card.

- Attach the shield onto the top of the Arduino board.
- Put the micro SD card into the micro SD slot on the shield.
- Plug the speaker into the audio socket on the shield.
- Connect the board to the computer and upload example ‘Player’.
Code
Find the code in Example>EducationShield>Help>Player.
You should hear the speaker play your sound, be silent for one second and then repeat.
Commands
-
Player()– Creates a player object. -
begin()– Initializes the player and prints the status to the serial monitor. play( soundFileName )– Plays a sound file from the micro SD card.- Parameters
- (
char*)soundFileName– The name of the sound file to be played. Must be a .wav file.
- (
- Parameters
Troubleshooting
- Make sure the speaker is plugged in all the way.
- Open the serial monitor. If the file can not be opened, format the micro SD card with FAT format and try again.
- Make sure that the sound files are prepared according to the tutorial Prepare Wav Sound, so they have the right format.