Standard servos have a rotation angle limited to 180º. It has precise control over the angle of rotation.
Materials

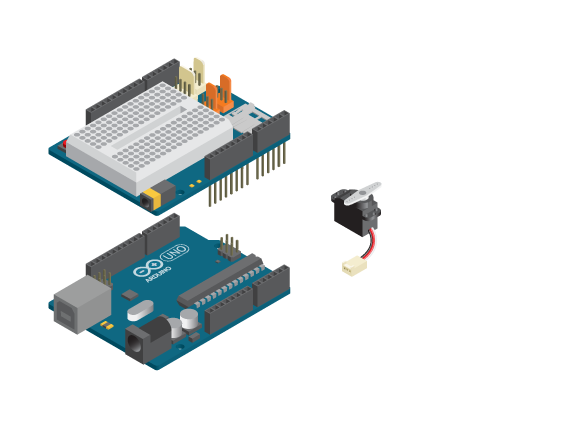
- 1 Arduino Uno board
- 1 Education Shield
- 1 standard servo
Instructions

- Attach the shield onto the top of the Arduino board.
- Attach a servo arm to the standard servo.
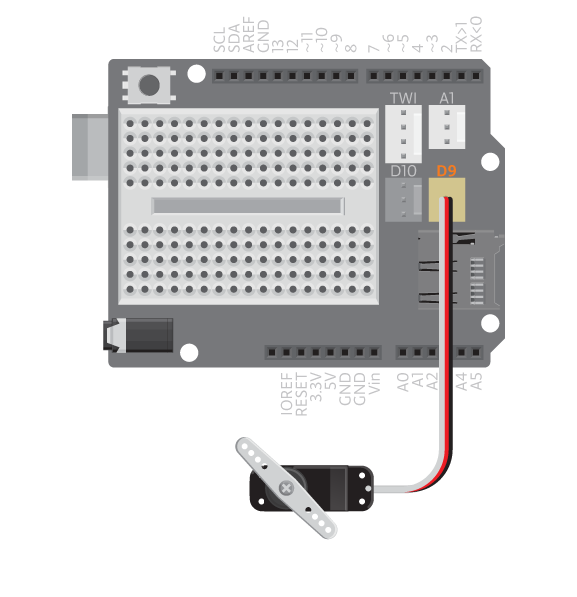
- Connect the standard servo to D9.
- Connect the board to the computer and upload example ‘StandardServo’.
Code
Find the code in Example>EducationShield>Help>StandardServo
Commands
-
#include <Servo.h>– includes the Servo library used to control the servos. -
Servo– creates a servo object. attach( digitalPin )– attaches the servo to a digital pin.- Parameters
-
(
int)digitalPin– the digital pin to which the servo is connected.
-
- Parameters
write( degrees )– makes the standard servo shaft rotate to a specific position.- Parameters
- (
int)degrees– the angle position to which the servo is rotated to. A value between 0 and 180.
- (
- Parameters
Note: Due to the mechanical design of your projects, sometimes the allowed rotation angle for the servo is much smaller than 180 degrees. If you see the servo arm pushing/pulling hard against other parts of your project, try taking down the servo arm, put it back to a more appropriate angle. You may need a few tries before getting it right.
Troubleshooting
- Make sure you have connected the servo to the same pin as you have stated in the code.