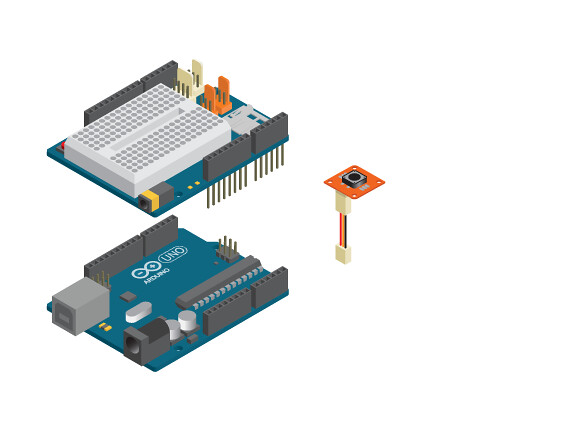
A button is a digital input. This means that it can have two states, you read these as either HIGH (5V) or LOW (0V).
Materials

- 1 Arduino Uno board
- 1 Education shield
- 1 TinkerKit Button
- 1 TinkerKit wire
Instructions

- Attach the shield onto the top of the Arduino board.
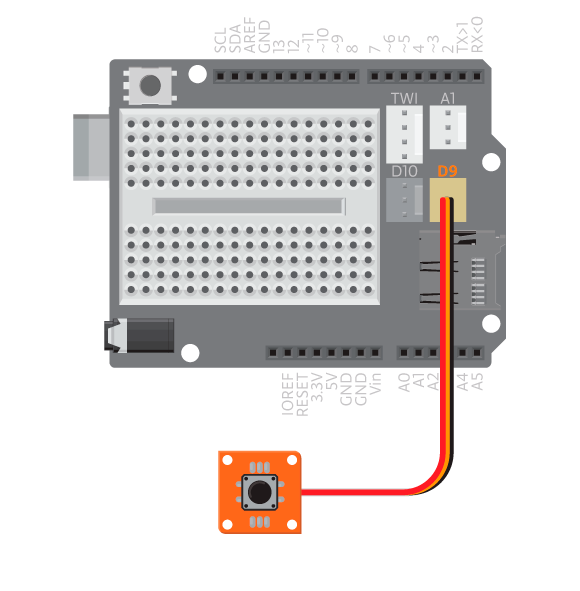
- Connect the TinkerKit button to D9 using the TinkerKit wire.
- Connect the board to the computer and upload example ‘Button’.
Code
Find the code in Example>EducationShield>Help>Button
You should now open the serial monitor and follow the printed instructions. Each time you execute an instruction the serial monitor should print ‘1’.
Commands
Button( digitalPin )/Button( digitalPin, pressedState): creates a button object.- Parameters
- (
int)digitalPin: The digital pin to which the button is connected. -
(
boolean)pressedState: can beHIGHorLOW.HIGHmeans that when the button is pressed it will be read asHIGH, when released it will be read asLOW.LOWmeans the other way around. When pressed it will be read asLOWand when released it will be read asHIGH. Default isHIGH.
- (
- Parameters
begin(): Initializes the component. Must be called insetup()
pressed( timeout ): checks if the button is pressed.- Parameters
- (
int)timeout: milliseconds within which the button needs to be pressed. Default is 0.
- (
- Return
-
(
boolean): returns 1 if pressed within time, otherwise 0. Iftimeoutis not used the program pauses here until the button is pressed.
-
- Parameters
released( timeout ): checks if the button is released.- Parameters
- (
int)timeout: milliseconds within which the button needs to be released. Default is 0.
- (
- Return
-
(
boolean): returns 1 if released within time, otherwise 0. Iftimeoutis not used, the program pauses here until the button is released.
-
- Parameters
doublePressed( timeout, tolerance ): checks if the button is double pressed.- Parameters
- (
int)timeout: milliseconds within which the button needs to be double pressed. - (
int)tolerance: milliseconds before the button should be pressed a second time. Default is 500.
- (
- Return
- (
boolean) Returns 1 if double pressed within time, otherwise 0. Iftimeoutis not used, the program pauses here until the button is double pressed.
- (
- Parameters
Troubleshooting
- First of all make sure that the connection between button, wire and board is correct.
- On the back of the TinkerKit button there is a small LED that lights up when the button is connected. If you are sure that it is connected correctly and the LED still does not light up, the button is probably broken.
- Make sure that the program is reading from the dame digital pin as you have connected it to.