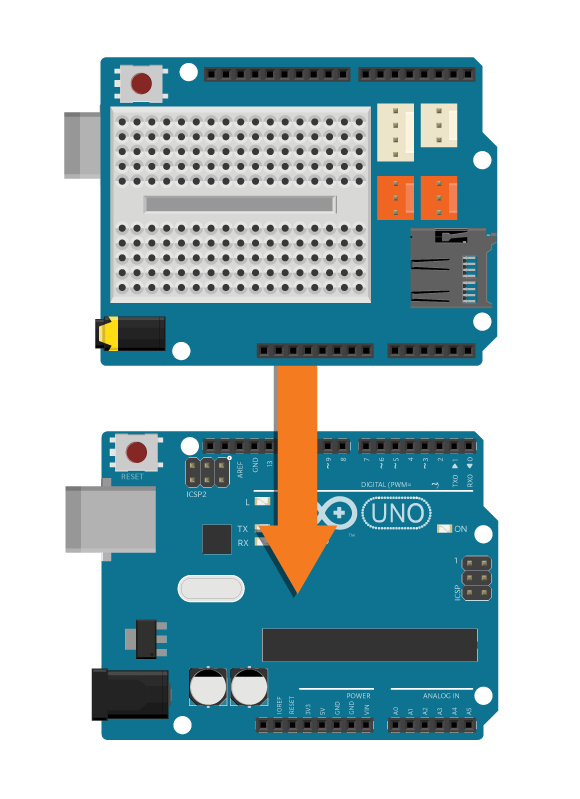
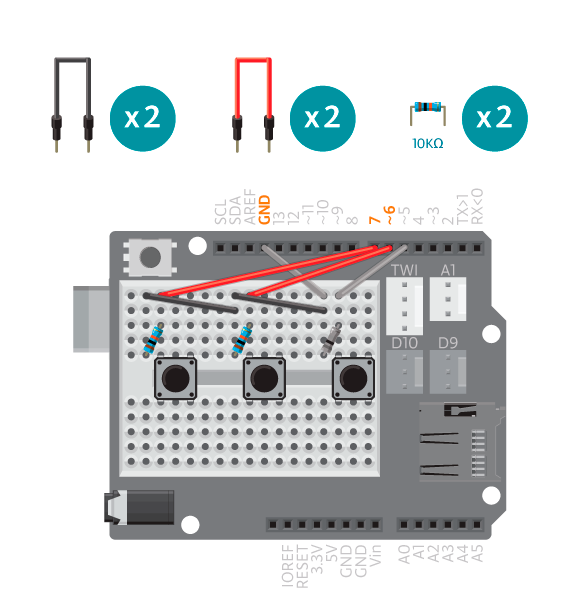
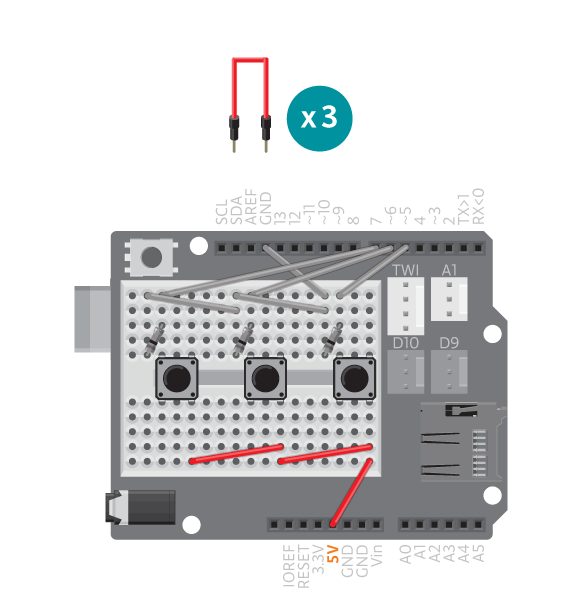
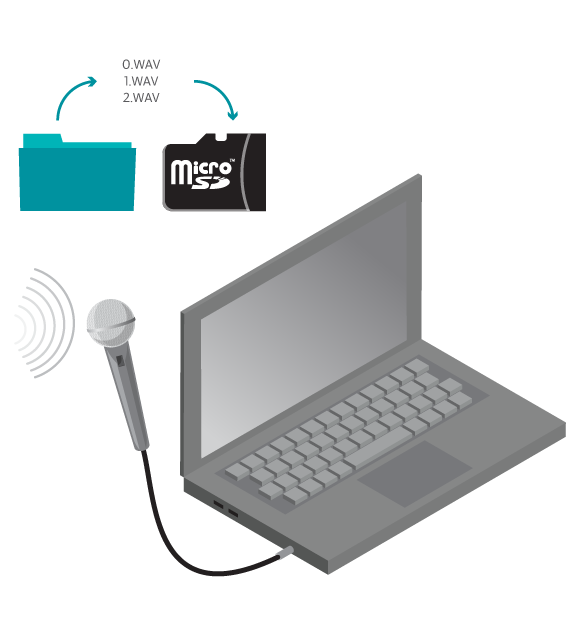
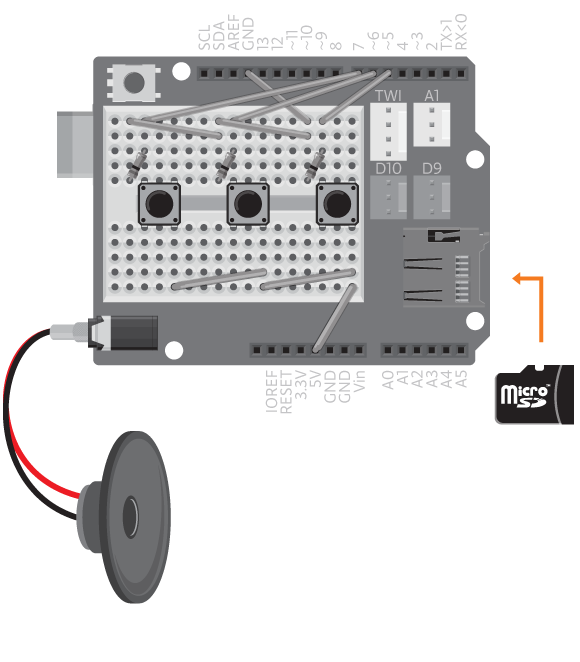
This is your first step towards these kinds of skills. The boom box is a small sample player you can use to make music, or just random sound. It comes with three prerecorded samples but we probably don’t have the same creative cleverness when it comes to recording as you do so you should definitely record your own samples too!
Materials
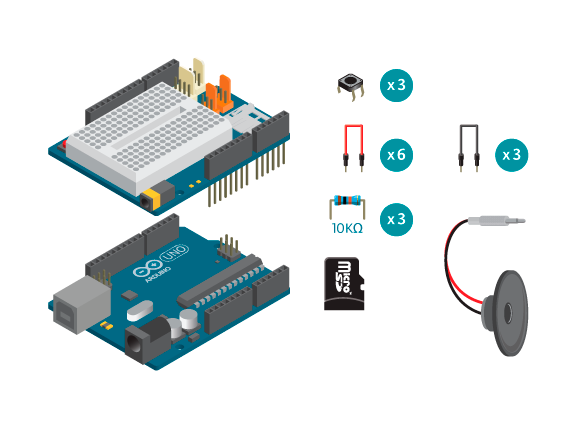
- 1 Arduino Uno board
- 1 Education Shield
- 1 micro SD card
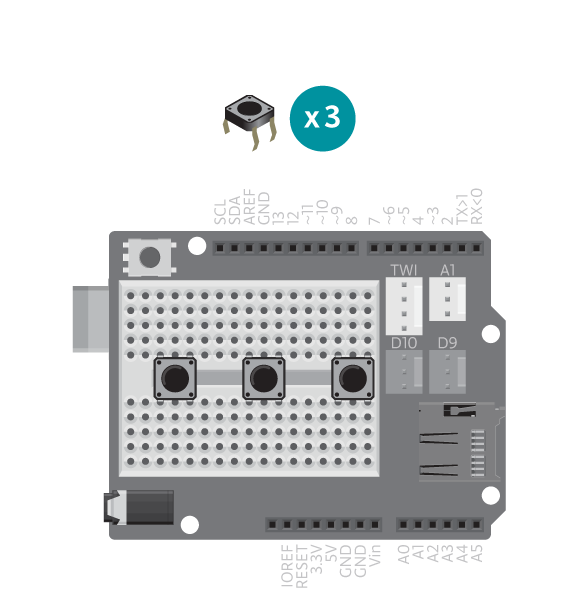
- 3 buttons
- 1 8 ohm speaker
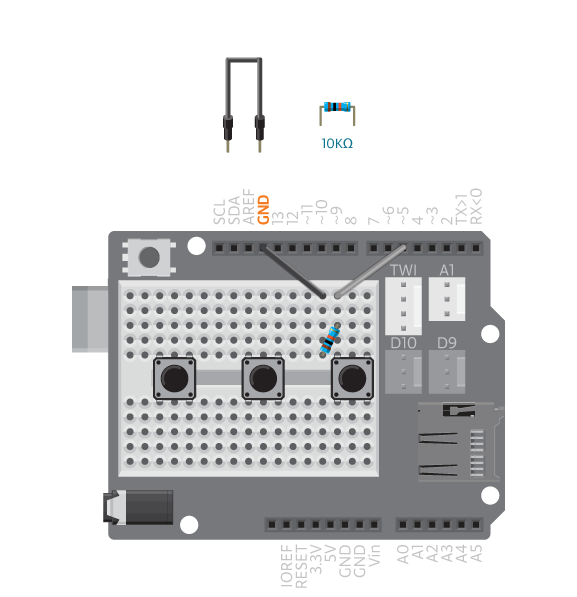
- 3 10k ohm resistors
- 3 black jumper wires
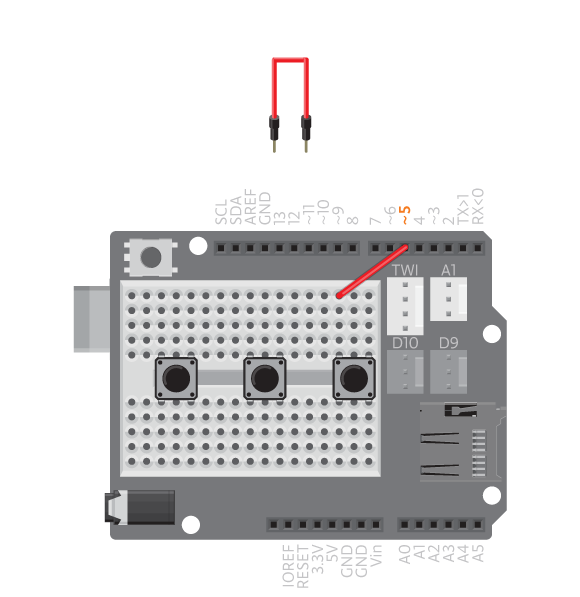
- 6 colored jumper wires
Instructions
Code
Find the code in File>Examples>EducationShield>Block3-Magic>Projects>BoomBox
How it works
- The EducationShield and SD libraries are included.
- The button group variables are declared,
bg,buttons[]andbuttonsCount. - The Player object,
playeris declared. - In
setup(), the serial communication is initialized. - The player and button group are configured and initialized.
- The variable
pressedButtonis declared and assigned the value read frombg. - A switch case is used to decide what to do depending on the value held by
pressedButton. - If
pressedButtonis equal to 0, “sound 0” is printed to the serial monitor and the sound file 0.wav is played. - If
pressedButtonis equal to 1, “sound 1” is printed to the serial monitor and the sound file 1.wav is played. - If
pressedButtonis equal to 2, “sound 0” is printed to the serial monitor and the sound file 2.wav is played. loop()continues to loop.
Troubleshooting
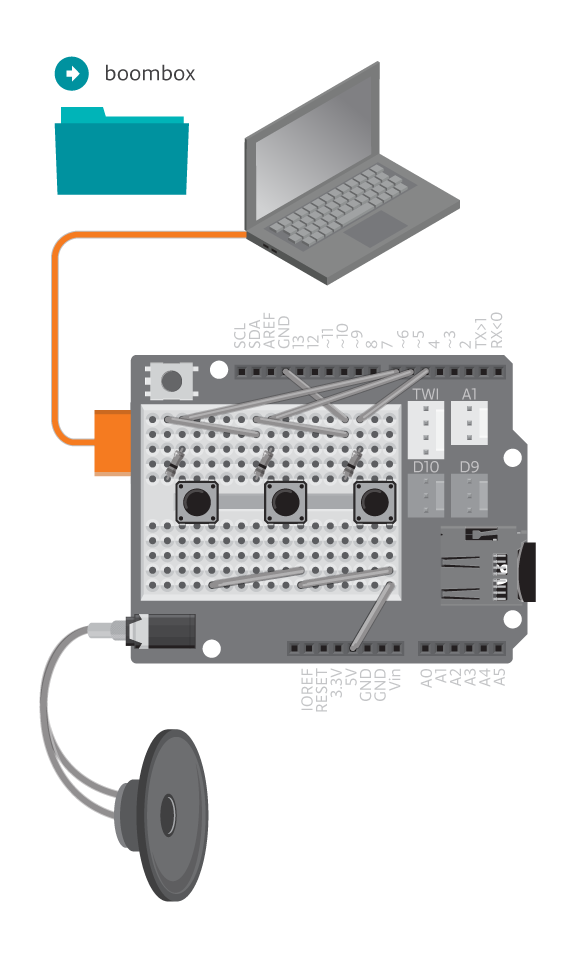
- Refer to the illustration and double check your connections. Make sure the shield and jumper wires are firmly connected.
- Debug the buttons, see the button reference.
- Debug the music player, see the Player reference for details.
Learn by doing
- Play more sounds: add more buttons.
