Arduino boards are small computers with which you can read information from a variety of sensors as well as control lights, motors and other things. Many of the things around you are computers of different sizes. Computers do not need to have a keyboard or a screen. There are computers in the microwave oven in the kitchen, inside elevators to detect the buttons you press, and cars have as many as 70 small Arduino-like computers inside … there are computers everywhere in your life.
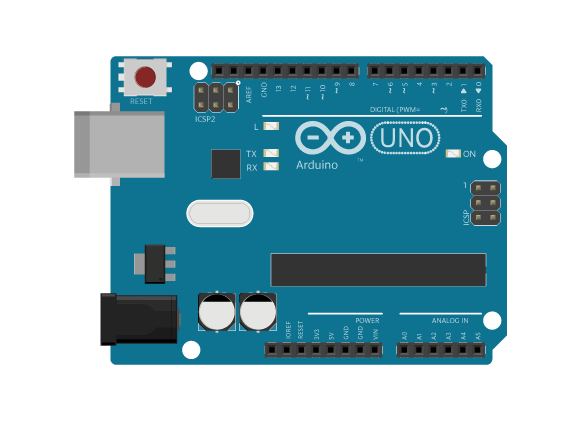
There are many different kinds of Arduino boards. The one you will use is called Arduino UNO.

The board has several pins that are numbered and grouped by functionality. There is a group of 14 pins (numbered 0 to 13) that are the digital pins and yet another group of 6 pins (labelled A0 to A5) that are the analog ones. In the next sections you will learn what that means and how to use them.
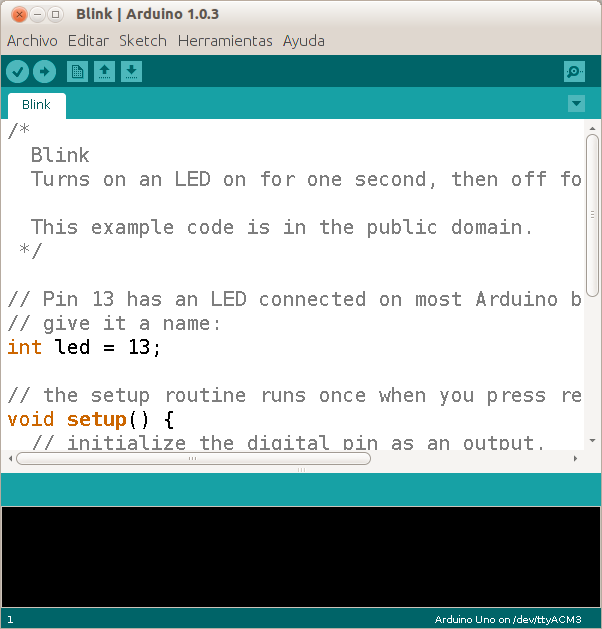
Since the Arduino, unlike the computer you normally use, does not have a screen or a keyboard, you need to use external software running on a different computer when writing programs for your Arduino board. That software is the Arduino IDE. You write your program in the IDE, upload it to the Arduino board, and the program will be executed on the board.

 Check whether your program will work (Compile)
 Upload the program to the Arduino board
 Create a new program
 Open a program
 Store the program onto the computer’s hard drive
 (all the way to the right) open a communication window with the Arduino board
Just like the Processing IDE, the Arduino IDE has a message area that, when you compile and upload your programs, gives you information about any errors. If the program is uploaded without any errors, the message will say “Done uploading”.
[screenshot]
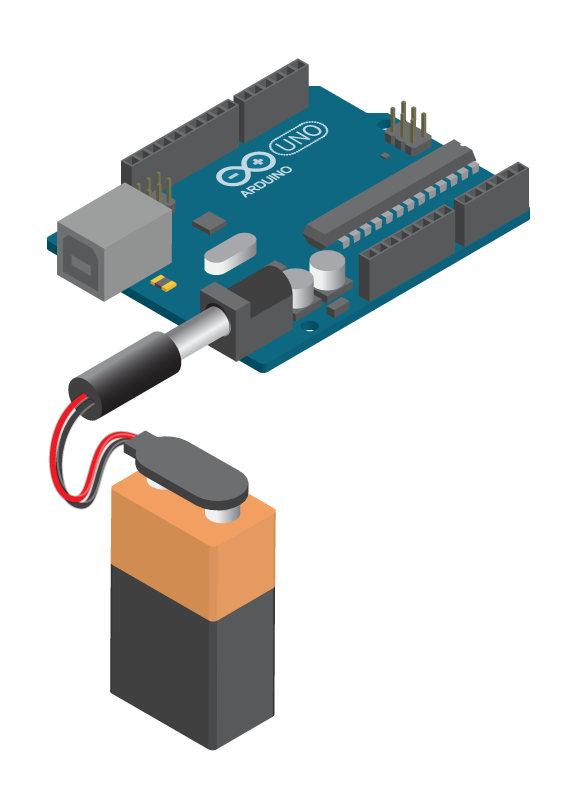
Arduino boards connect to your computer using a USB cable, just like other computer peripherals like a printer, a keyboard, or even a game controller. The Arduino needs to be connected to a computer through the USB cable when uploading a program. The USB cable also supplies power to the Arduino board, but you could get your board to run using an external power source like a battery or a power supply.

When programming the Arduino board, you should make sure the IDE is configured correctly. Check the ‘Tools → Boards’ menu to see if the chosen board is ‘Arduino Uno’ and then ‘Tools → Serial Port’ menu to see that you have chosen the right port.
- Disconnect the Arduino board from your computer.
- Check ‘Tools → Serial Port’ and see what is available.
- Connect the Arduino board to your computer.
- Check ‘Tools → Serial Port’ again and you should see a new port – that is your Arduino.
- Select that new port.
Good to know
In the following sections you will learn how to program with Arduino. If you want to know more about the functions you will use, you can go to the Arduino reference page and read more about it in English.
In this block’s projects you will use the functions of the EducationShield library. In the world of programming a library is a collection of code that you can call from your own code. While, as explained in Block 1, a function is a set of commands contained in one line of code, a library is a collection of functions. When you include the EducationShield library in a sketch, you can call all the different functions included in the library. See the whole list of functions included in the EducationShield library here.
See tutorials of how to install the Arduino IDE here.